| Darunia | |
 | |
| Era: | |
| Race: | |
| Title(s): | Goron Chief
|
| Occupation: | Ruler
|
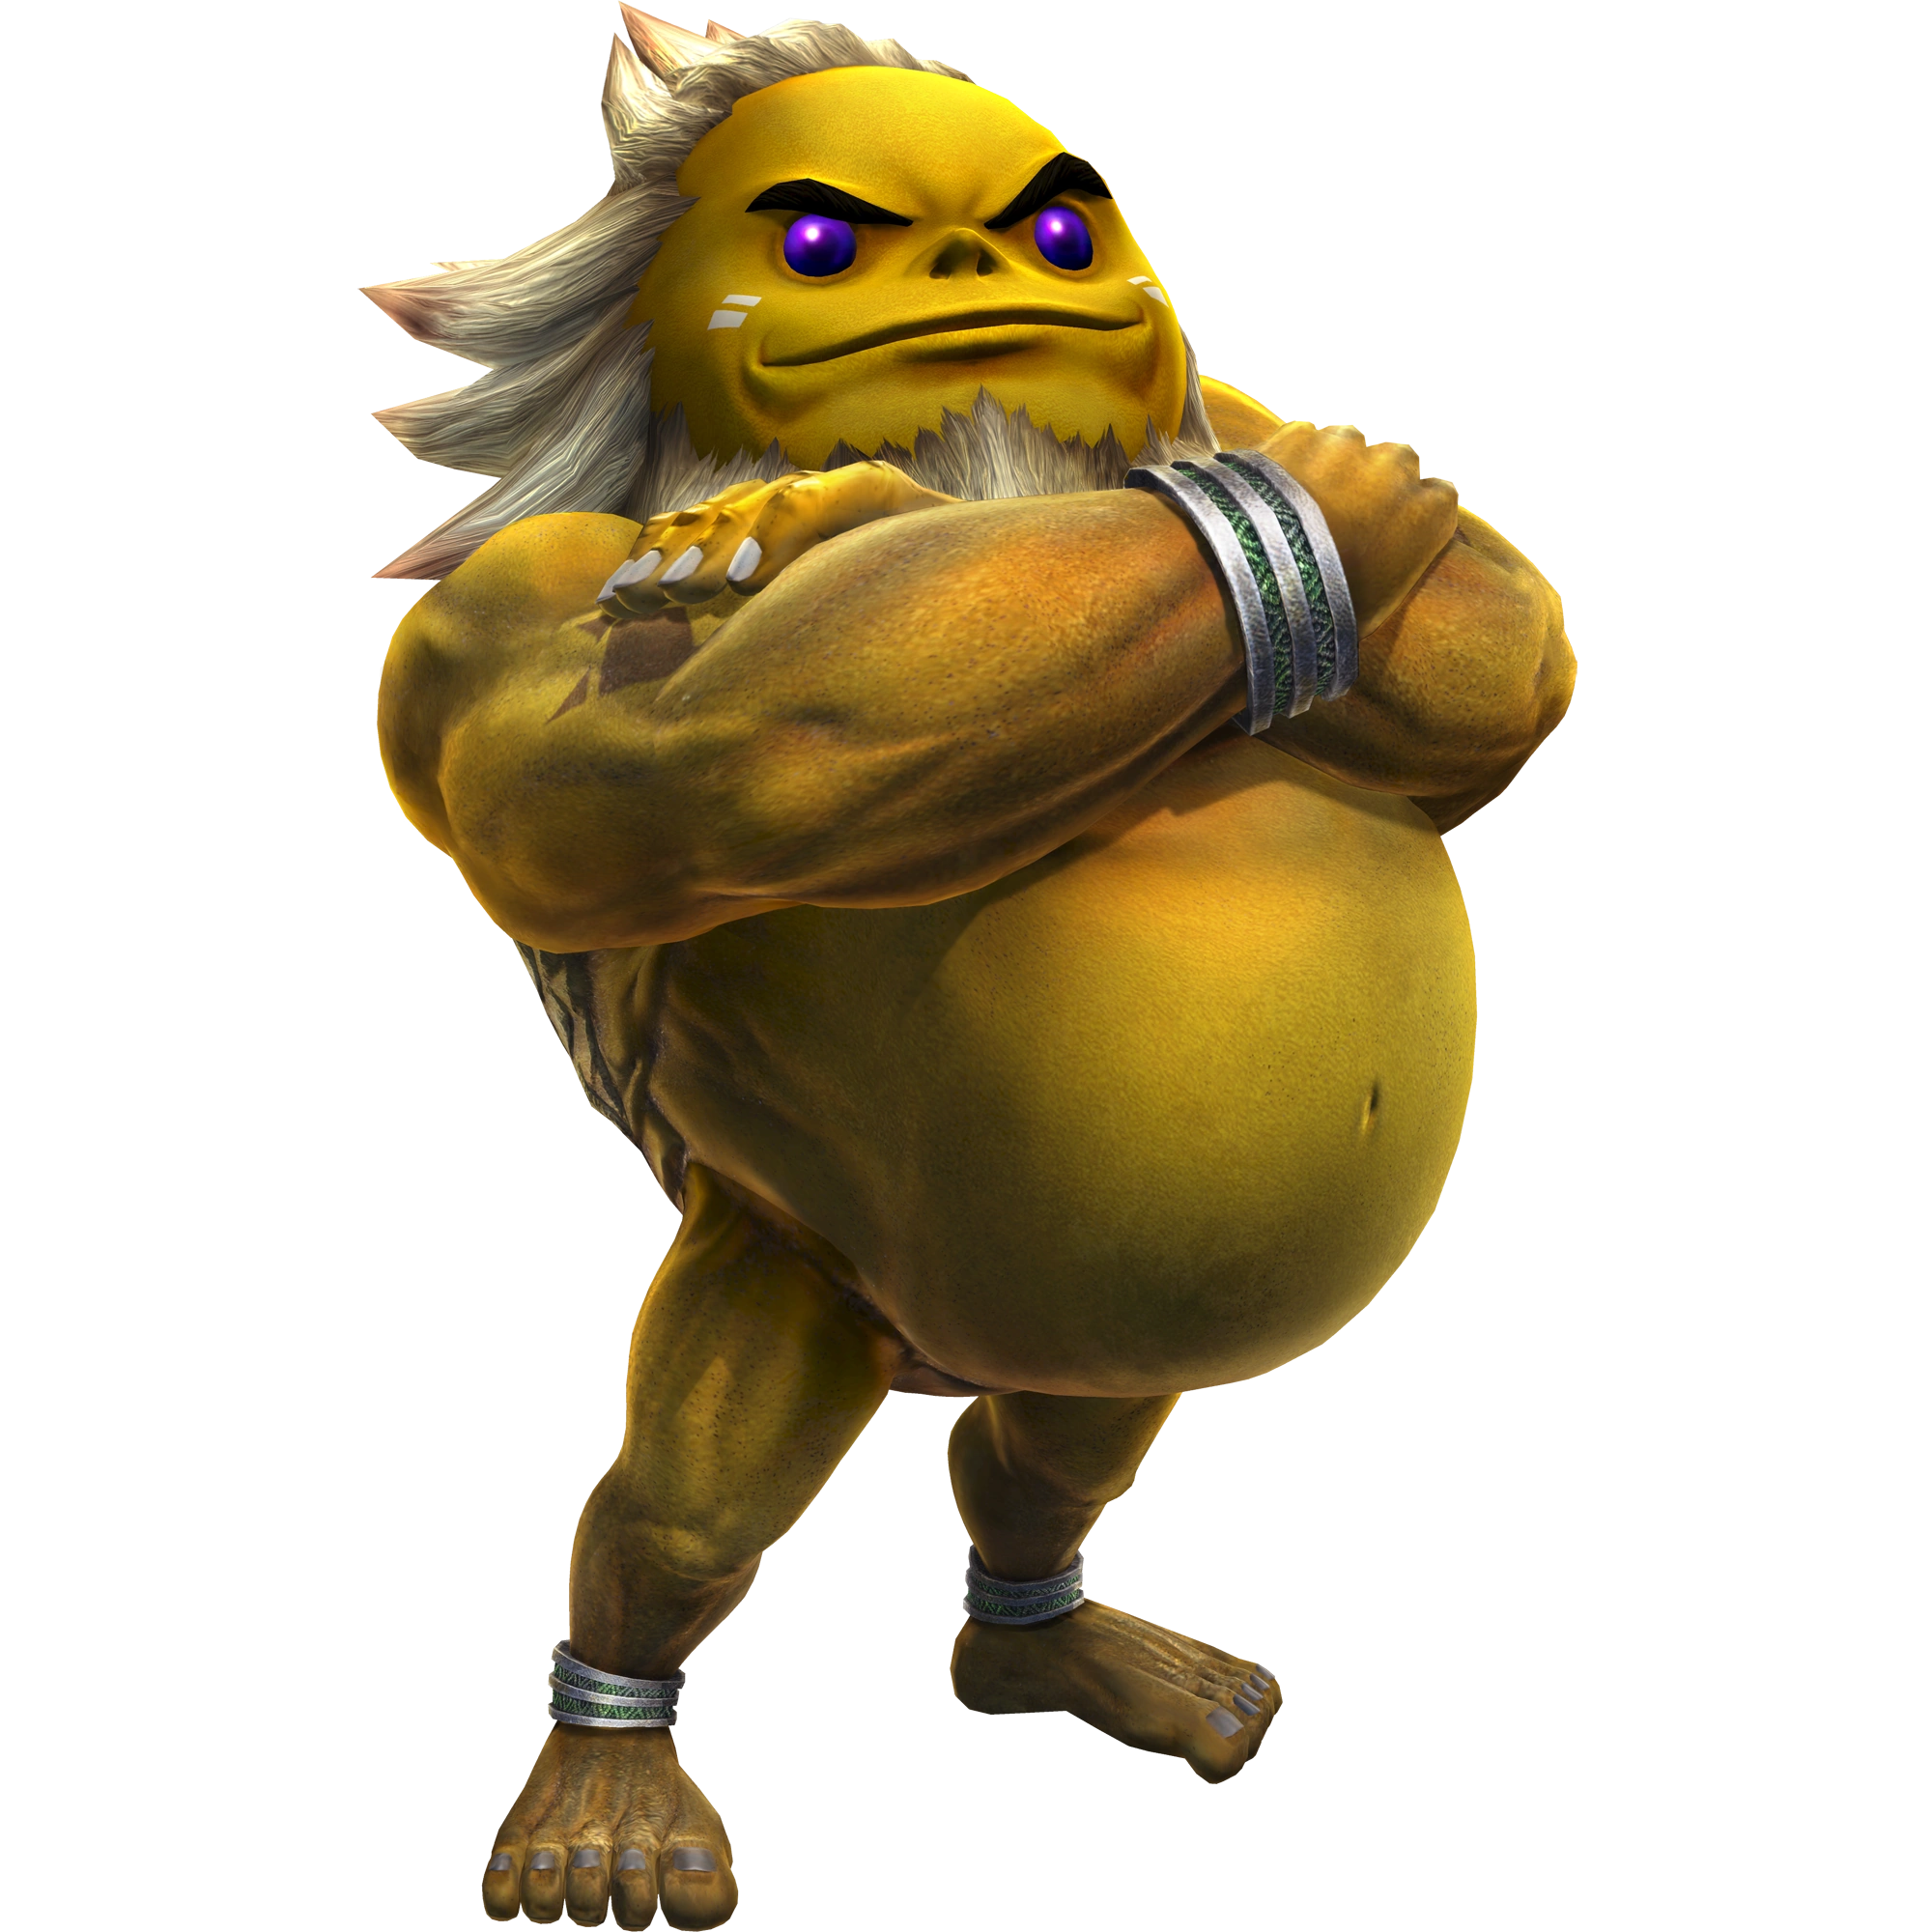
| Weapon(s): | Hammer
|
| Weakness: | Water
|
| Useful Weapon Skill: | VS Time
|
| Voice Actors: | Kousuke Takaguchi
|
| First Appearance: | Hyrule Warriors |
Darunia (ダルニア, Darunia) is a playable character in Hyrule Warriors. He originated from Ocarina of Time.
Role in Game[]
After Cia ravaged Hyrule and fused the lands, Wizzro put on Zelda's appearence, manipulating Darunia to capture Princess Ruto by afflicting him with a curse. Once Sheik and Impa arrive at Death Mountain, they discover that Darunia has captured Ruto, and is using some Goron soup to boost his stamina. After having his senses returned by Sheik and Impa, Darunia explains that Princess Zelda told him to do everything he had done. The four travel to Lake Hylia, where they discover that "Zelda" has taken residence in Ruto's abscense. After helping reclaim Lake Hylia, Darunia henceforth serves as a faithful and kind ally to the real Zelda's forces, even going so far as to use a Bombchu in the final battle against Ganondorf.
Character Information[]
Personality[]
Darunia tends to act stubborn towards outsiders but is quite fraternal to those he deems trustworthy. He will call anyone who has fought in battle (and a really good he too) with him, “Brother”, even if it is a girl. He also will seek out revenge (only if it satisfies him), even if it means abandoning Princess Ruto or other characters.
Quotes[]
See also: Darunia/Quotes
Gameplay[]
| Keys: | Y Normal Attack ▲ | X Charge Attack ▲ | A Special Technique ▲ | B Evade |
- X: Darunia rolls into a ball and charges forward. The player can continue pressing X to extend the roll's duration. If Darunia catches an enemy with his roll and the player continues to press X, he will finish this attack by leaping out of his ball form and striking anything he has trapped with a forward palm thrust. If Darunia fails to catch an enemy, he will temporarily become dizzy, leaving him vulnerable for a moment. The player can also use this attack as a guaranteed Weak Point Smash.
- Y, X: Darunia slams his hammer onto the ground, then slams his hand on the back of hammer, causing a small explosion that bounces the hammer back over Darunia's head, hitting the area behind him.
- Y, Y, X: Darunia turns around and slams down hard onto the ground, launching enemies into the air.
- Y, Y, Y, X: Darunia embeds his hammer into the ground, then leaps up and ground-pounds on his weapon's head, sending out a large pillar of fire that travels forward and burns his foes. If properly aimed, the pillar of fire can hit a Giant Boss's Weak Point Gauge multiple times.
- Y, Y, Y, Y, X: Darunia jams the hilt of his hammer into the ground and slams both his fists onto the head, creating a small pool of lava around him that causes all nearby enemies except for Giant Bosses to crumple to the ground.
- Y, Y, Y, Y, Y, X: Darunia generates a summoning circle around him that creates a large, molten boulder. The boulder then drops from the sky above Darunia, who catches it and hurls it forward.
- Y, Y, Y, Y, Y, Y: Darunia swings his hammer down in front of him, pounding the ground twice. He then does a horizontal swing, followed by two more spinning swings. He then stomps his right foot onto the ground which deals knockback. With both gripping the hammer, he spins five times before leaping up into the air. He finishes by slamming the hammer hard onto the ground, causing an explosion.
- A: Darunia's hammer ignites before he rapidly hammers the ground four times while slowly moving forward, with the fourth strike creating a large explosion that sends his foes flying.
- Focus Spirit + A: Darunia winds up with his right arm and unleashes an explosive, fiery punch that blows away anything in front of him.
- Focus Spirit Finisher: Darunia leaps into the air and curls up into a ball, then slams into the ground twice. He then grows to an enormous size before slamming into the ground for a third and final time.
- Weak Point Smash: Darunia stomps both feet onto the ground in a classic Sumo dance. He then hefts his hammer over his head as it becomes enveloped in flames before performing a large, overhead swing onto the enemy in front of him, causing a large explosion.
Fighting Style[]
Darunia offers a twist on the classic heavy and slow character archetype, offering a few surprisingly quick attacks (most notably his first two hits of his standard string), good range on some heavy attacks, and even a good weak point smasher. However, Darunia is held back by two major things: he lacks a good boss-killing move and most of his other attacks are slow, as expected. Darunia is best used in missions where no bosses appear, wherein the player should focus on making the most of his powerful heavy attacks against his foes, and using his heavy attack on commanders and generals.
Weapons[]
| Weapon Information (Element: Fire) | ||
|---|---|---|
| Description: A special hammer for Darunia's use only. Use the Strong Attack button to charge at enemies. Hit an enemy to lock on to that enemy, allowing you to follow up with more Strong Attacks! | ||
| Magic Hammer | Skill Slots: 1~2 | |
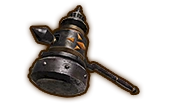
|
Base Attack: 80 | 1★ Attack: 88 |
| 2★ Attack: 96 | 3★ Attack: 104 | |
| 4★ Attack: 112 | 5★ Attack: 120 | |
| Igneous Hammer | Skill Slots: 3~4 | |
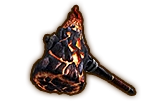
|
Base Attack: 150 | 1★ Attack: 165 |
| 2★ Attack: 180 | 3★ Attack: 195 | |
| 4★ Attack: 210 | 5★ Attack: 225 | |
| Megaton Hammer | Skill Slots: 6~8 | |
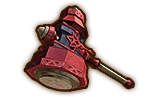
|
Base Attack: 280 | 1★ Attack: 308 |
| 2★ Attack: 336 | 3★ Attack: 364 | |
| 4★ Attack: 392 | 5★ Attack: 420 | |
| 8-Bit Food (HW) | Skill Slots: 6~8 | |
|
Base Attack: 280 | 1★ Attack: 308 |
| 2★ Attack: 336 | 3★ Attack: 364 | |
| 4★ Attack: 392 | 5★ Attack: 420 | |
| Megaton Hammer + (Legends) | Skill Slots: 7~8 | |
|
|
Base Attack: 500 | 1★ Attack: 550 |
| 2★ Attack: 600 | 3★ Attack: 650 | |
| 4★ Attack: 700 | 5★ Attack: 750 | |
| Darkfire Hammer (Legends) | Skill Slots: 7~8 | |
|
|
Base Attack: 500 | 1★ Attack: 550 |
| 2★ Attack: 600 | 3★ Attack: 650 | |
| 4★ Attack: 700 | 5★ Attack: 750 | |
| Secondary Element: Darkness | ||
Badge Materials[]
- See also: Hyrule Warriors/Badges
| Badge | Materials | ||
|---|---|---|---|
| Kokiri Sword I | Old Rag (1x) | ||
| Kokiri Sword II | Goron Armor Breastplate (1x) | Old Rag (1x) | |
| Kokiri Sword III | Lizalfos Scale (1x) | Old Rag (1x) | |
| Kokiri Sword IV | Fiery Aeralfos Leather (1x) | Old Rag (1x) | |
| Stamina Fruit I | Aeralfos Leather (1x) | ||
| Stamina Fruit II | Agitha's Basket (1x) | Manhandla's Toxic Dust (1x) | Aeralfos Leather (3x) |
| Stamina Fruit III | Agitha's Pendant (1x) | Manhandla's Toxic Dust (2x) | Round Aeralfos Shield (2x) |
| Digging Mitts I | Aeralfos Leather (3x) | ||
| Digging Mitts II | Agitha's Basket (1x) | Manhandla's Toxic Dust (1x) | Aeralfos Leather (3x) |
| Digging Mitts III | Agitha's Pendant (1x) | Manhandla's Toxic Dust (2x) | Round Aeralfos Shield (2x) |
| Din's Fire I | Lizalfos Scale (1x) | Old Rag (1x) | |
| Din's Fire II | Fiery Aeralfos Leather (1x) | Old Rag (1x) | |
| Din's Fire III | Agitha's Pendant (1x) | Manhandla's Toxic Dust (2x) | Round Aeralfos Shield (2x) |
| Hover Boots I | Aeralfos Leather (2x) | ||
| Hover Boots II | Agitha's Basket (1x) | Manhandla's Toxic Dust (1x) | Aeralfos Leather (3x) |
| Hover Boots III | Agitha's Pendant (1x) | Manhandla's Toxic Dust (2x) | Round Aeralfos Shield (2x) |
| Fierce Deity's Mask I | Fiery Aeralfos Leather (1x) | Old Rag (1x) | |
| Fierce Deity's Mask II | Agitha's Pendant (1x) | Manhandla's Toxic Dust (2x) | Round Aeralfos Shield (2x) |
| Badge | Materials | ||
|---|---|---|---|
| Empty Bottle I | Rock (1x) | ||
| Empty Bottle II | Fiery Aeralfos Leather (1x) | Rock (1x) | |
| Empty Bottle III | Manhandla's Sapling (1x) | Agitha's Basket (2x) | Round Aeralfos Shield (2x) |
| Hornet Larvae I | Aeralfos Leather (1x) | ||
| Hornet Larvae II | Agitha's Basket (1x) | Manhandla's Toxic Dust (1x) | Manhandla's Toxic Dust (1x) |
| Hornet Larvae III | Manhandla's Sapling (1x) | Agitha's Basket (2x) | Round Aeralfos Shield (2x) |
| Nayru's Love I | Aeralfos Leather (3x) | ||
| Nayru's Love II | Agitha's Basket (1x) | Manhandla's Toxic Dust (1x) | Aeralfos Leather (3x) |
| Nayru's Love III | Manhandla's Sapling (1x) | Agitha's Basket (2x) | Round Aeralfos Shield (2x) |
| Goron Tunic I | Aeralfos Leather (2x) | ||
| Goron Tunic II | Agitha's Basket (1x) | Manhandla's Toxic Dust (1x) | Aeralfos Leather (3x) |
| Goron Tunic III | Manhandla's Sapling (1x) | Agitha's Basket (2x) | Round Aeralfos Shield (2x) |
| Zora Tunic I | Aeralfos Leather (2x) | ||
| Zora Tunic II | Agitha's Basket (1x) | Manhandla's Toxic Dust (1x) | Aeralfos Leather (3x) |
| Zora Tunic III | Manhandla's Sapling (1x) | Agitha's Basket (2x) | Round Aeralfos Shield (2x) |
| Magic Armor I | Aeralfos Leather (2x) | ||
| Magic Armor II | Agitha's Basket (1x) | Manhandla's Toxic Dust (1x) | Aeralfos Leather (3x) |
| Magic Armor III | Manhandla's Sapling (1x) | Agitha's Basket (2x) | Round Aeralfos Shield (2x) |
| Sacred Shield I | Aeralfos Leather (2x) | ||
| Sacred Shield II | Agitha's Basket (1x) | Manhandla's Toxic Dust (1x) | Aeralfos Leather (3x) |
| Sacred Shield III | Manhandla's Sapling (1x) | Agitha's Basket (2x) | Round Aeralfos Shield (2x) |
| Mirror Shield I | Aeralfos Leather (2x) | ||
| Mirror Shield II | Agitha's Basket (1x) | Manhandla's Toxic Dust (1x) | Aeralfos Leather (3x) |
| Mirror Shield III | Manhandla's Sapling (1x) | Agitha's Basket (2x) | Round Aeralfos Shield (2x) |
| Badge | Materials | ||
|---|---|---|---|
| Farore's Wind I | Metal Plate (1x) | ||
| Farore's Wind II | Agitha's Basket (1x) | Manhandla's Toxic Dust (1x) | Aeralfos Leather (3x) |
| Farore's Wind III | Agitha's Pendant (1x) | Agitha's Basket (2x) | Round Aeralfos Shield (2x) |
| Goron's Bracelet I | Aeralfos Leather (2x) | ||
| Goron's Bracelet II | Agitha's Pendant (1x) | Agitha's Basket (2x) | Round Aeralfos Shield (2x) |
| Hawkeye I | Aeralfos Leather (2x) | ||
| Hawkeye II | Agitha's Pendant (1x) | Agitha's Basket (2x) | Round Aeralfos Shield (2x) |
| Beetle I | Aeralfos Leather (2x) | ||
| Beetle II | Agitha's Pendant (1x) | Agitha's Basket (2x) | Round Aeralfos Shield (2x) |
| Whip I | Aeralfos Leather (2x) | ||
| Whip II | Agitha's Pendant (1x) | Agitha's Basket (2x) | Round Aeralfos Shield (2x) |
Gallery[]
")
")
")
.png "Darunia Alternate Costume (HWL).png (2.07 MB)")
.png)
.png "Darunia Alternate Costume 2 (HWL DLC).png (225 KB)")
.png)
.png "Darunia Alternate Costume 3 (HWL DLC).png (68 KB)")
.png "Darunia Alternate Costume 4 (HWL DLC).png (49 KB)")
プレイムービー (17 KB)")
Trivia[]
- After beating a stage, rather than playing the usual stage complete theme, Darunia has his own theme; a medley of the victory theme and Saria's Song. The theme - as well as Darunia's own victory animation - is a reference to The Legend of Zelda: Ocarina of Time, where Darunia began dancing happily when he heard Link play Saria's Song on his Ocarina.
External Links[]
| This Hyrule Warriors related article is a stub. You can help the wiki by expanding it. |
| Hyrule Warriors • Legends • Definitive Edition • Hyrule Warriors: Age of Calamity |
| Characters |
| Hyrule Warriors |
| Link • Impa • Sheik • Lana • Princess Zelda • Ganondorf • Darunia • Princess Ruto • Agitha • Midna • Zant • Fi • Ghirahim • Cia • Volga • Wizzro • Twili Midna • Young Link • Tingle • Ganon • Cucco |
| Hyrule Warriors Legends |
| Linkle • Skull Kid • Toon Link • Tetra • King Daphnes • Medli • Marin • Toon Zelda • Ravio • Yuga |
| Hyrule Warriors Age of Calamity |
| Urbosa • Mipha • Daruk • Revali • Hestu • Sidon • Yunobo • Teba • Riju • Maz Koshia • Master Kohga • King Rhoam • Great Fairies • Terrako |
| EX: Pulse of the Ancients |
| Battle-Tested Guardian |
| EX: Guardian of Remembrance |
| Sooga • Purah & Robbie |
| Bosses |
| King Dodongo • Gohma • Manhandla • Argorok • The Imprisoned • Ganon • Great Fairy Helmaroc King • Phantom Ganon • Astor |
| Locations |
| Hyrule Warriors |
| Hyrule Field • Eldin Caves • Faron Woods • Valley of Seers • Death Mountain • Lake Hylia • Twilight Field • Palace of Twilight • Skyloft • Sealed Grounds • Temple of the Sacred Sword • Temple of Souls • Gerudo Desert • Ganon's Tower |
| Hyrule Warriors Legends |
| Forsaken Fortress • Wind and Earth Temples |
| Hyrule Warriors Age of Calamity |
| Breach of Demise • Zora's Domain • Tabantha Frontier • Gerudo Town • Hyrule Outpost • Great Hyrule Forest • Cenel Peak • Akkala Citadel • Yiga Clan Hideout • Damel Forest • Hyrule Castle • Lanayru Wetlands • Hyrule Ridge • Fort Hateno • Great Plateau • Hyrule Castle Town |
| EX: Guardian of Remembrance |
| Goponga Village • Kakariko Village • Lanayru Road • Mount Daphnes |
| Features |
| Items • Adventure Mode • Unit Types • Potion Mixtures • Badges • Materials • Weapon Skills • My Fairy |