| Impa | |
| Race: | |
| Title(s): | Hyrulean Captain
Royal Advisor, Loyal Friend (AC) |
| Occupation: | General
Guardian |
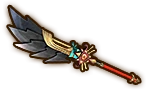
| Weapon(s): | Giant blade
Naginata Kodachi (AC) |
| Weakness: | Darkness
|
| Useful Weapon Skill: | VS Skyward
|
| Voice Actors: | Aki Nagao
Andi Gibson (EN) (AC) Akane Fujita (JP) (AC) |
| First Appearance: | Hyrule Warriors |
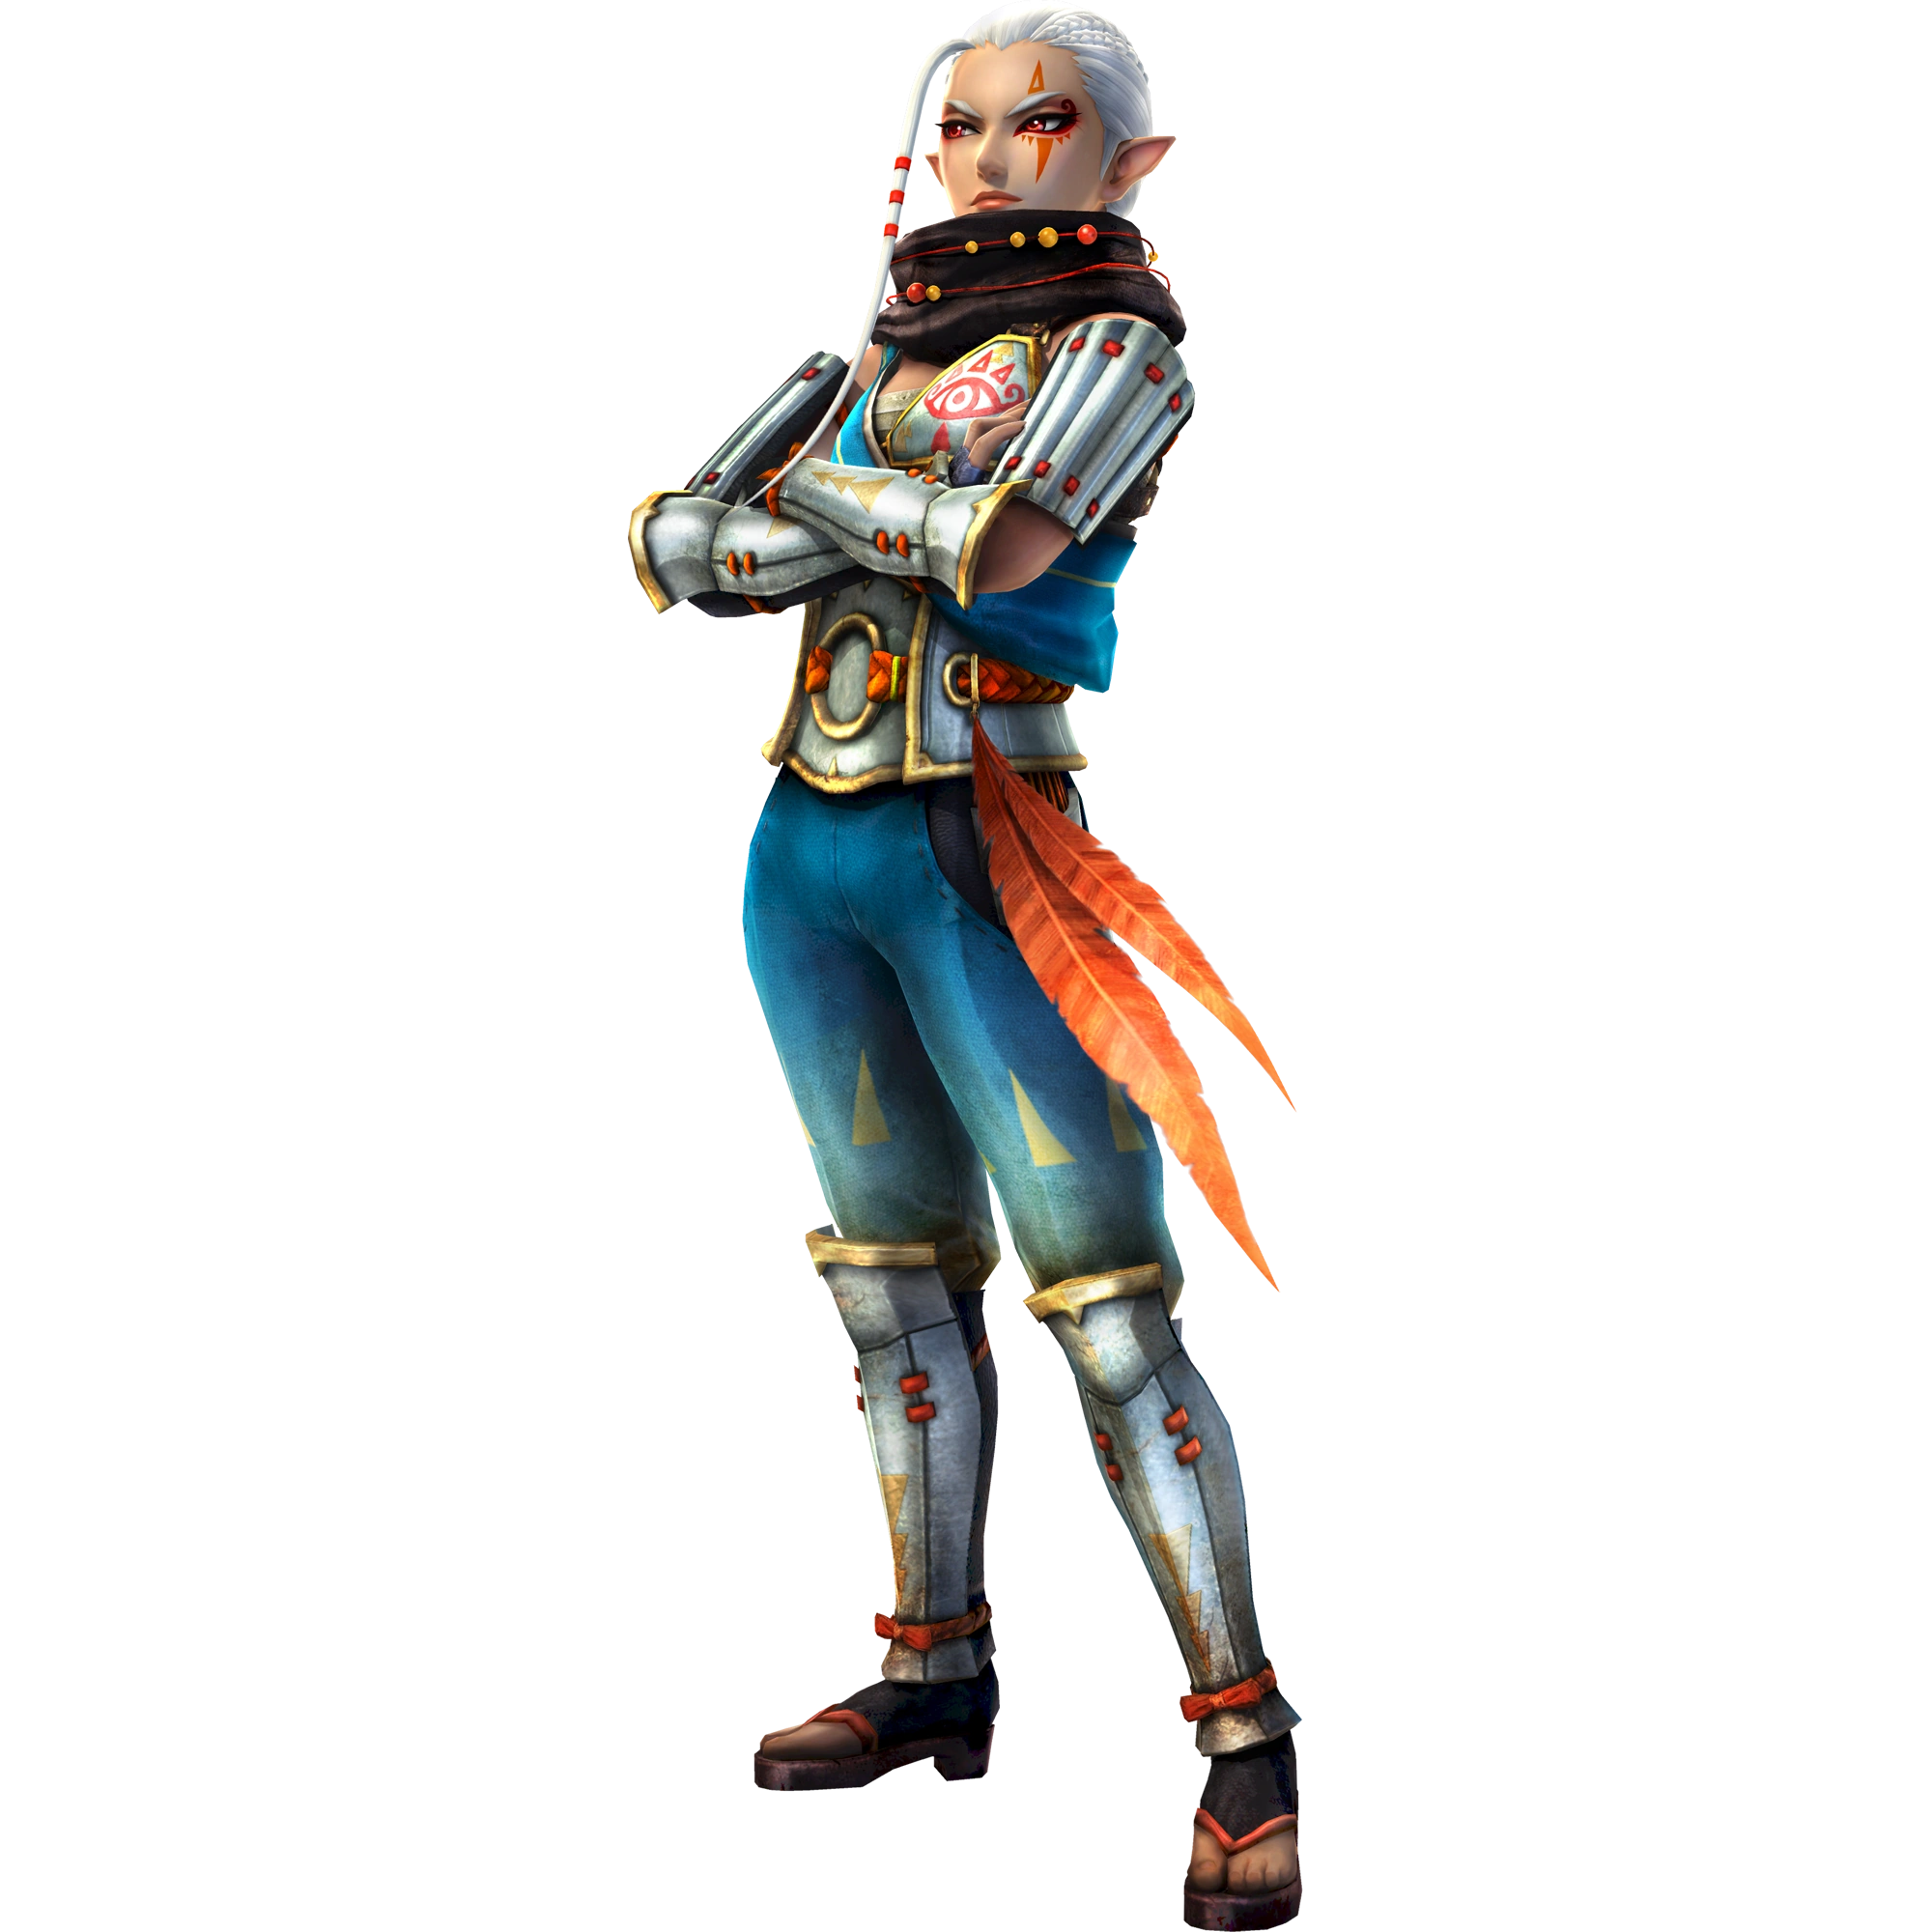
Impa (インパ, Inpa) is a playable character in Hyrule Warriors. One of the mainstay Legend of Zelda characters, she is present in most of the games with different designs and personalities. Regardless of her role or occupation, she is always Princess Zelda's confidant.
Role in Game[]
Hyrule Warriors[]
Like her past incarnations, Impa is the clan leader of the Sheikah, a group who have secretly served the royal family for generations. She is given the responsibility of looking after Princess Zelda. When Zelda goes missing at the beginning of the game, Impa is determined to get the princess back at any cost. She is suspicious of the newly arrived Sheik as she and Link persuaded Zelda's captors.
When the portals to different realities open up from the meddling of Cia, Impa takes a task force into the timeline of time, taking Sheik with her as she doesn't trust the mysterious new Sheikah member. During her quest to locate the seals holding both Ganon's soul and the master sword's binding, she rescues Ruto from a possessed Darunia and retakes the water temple and Lake Hylia in order to locate the seal in their timeline. Impa continues to fight against Cia's forces, eventually learning the secret identity of Sheik as Princess Zelda.
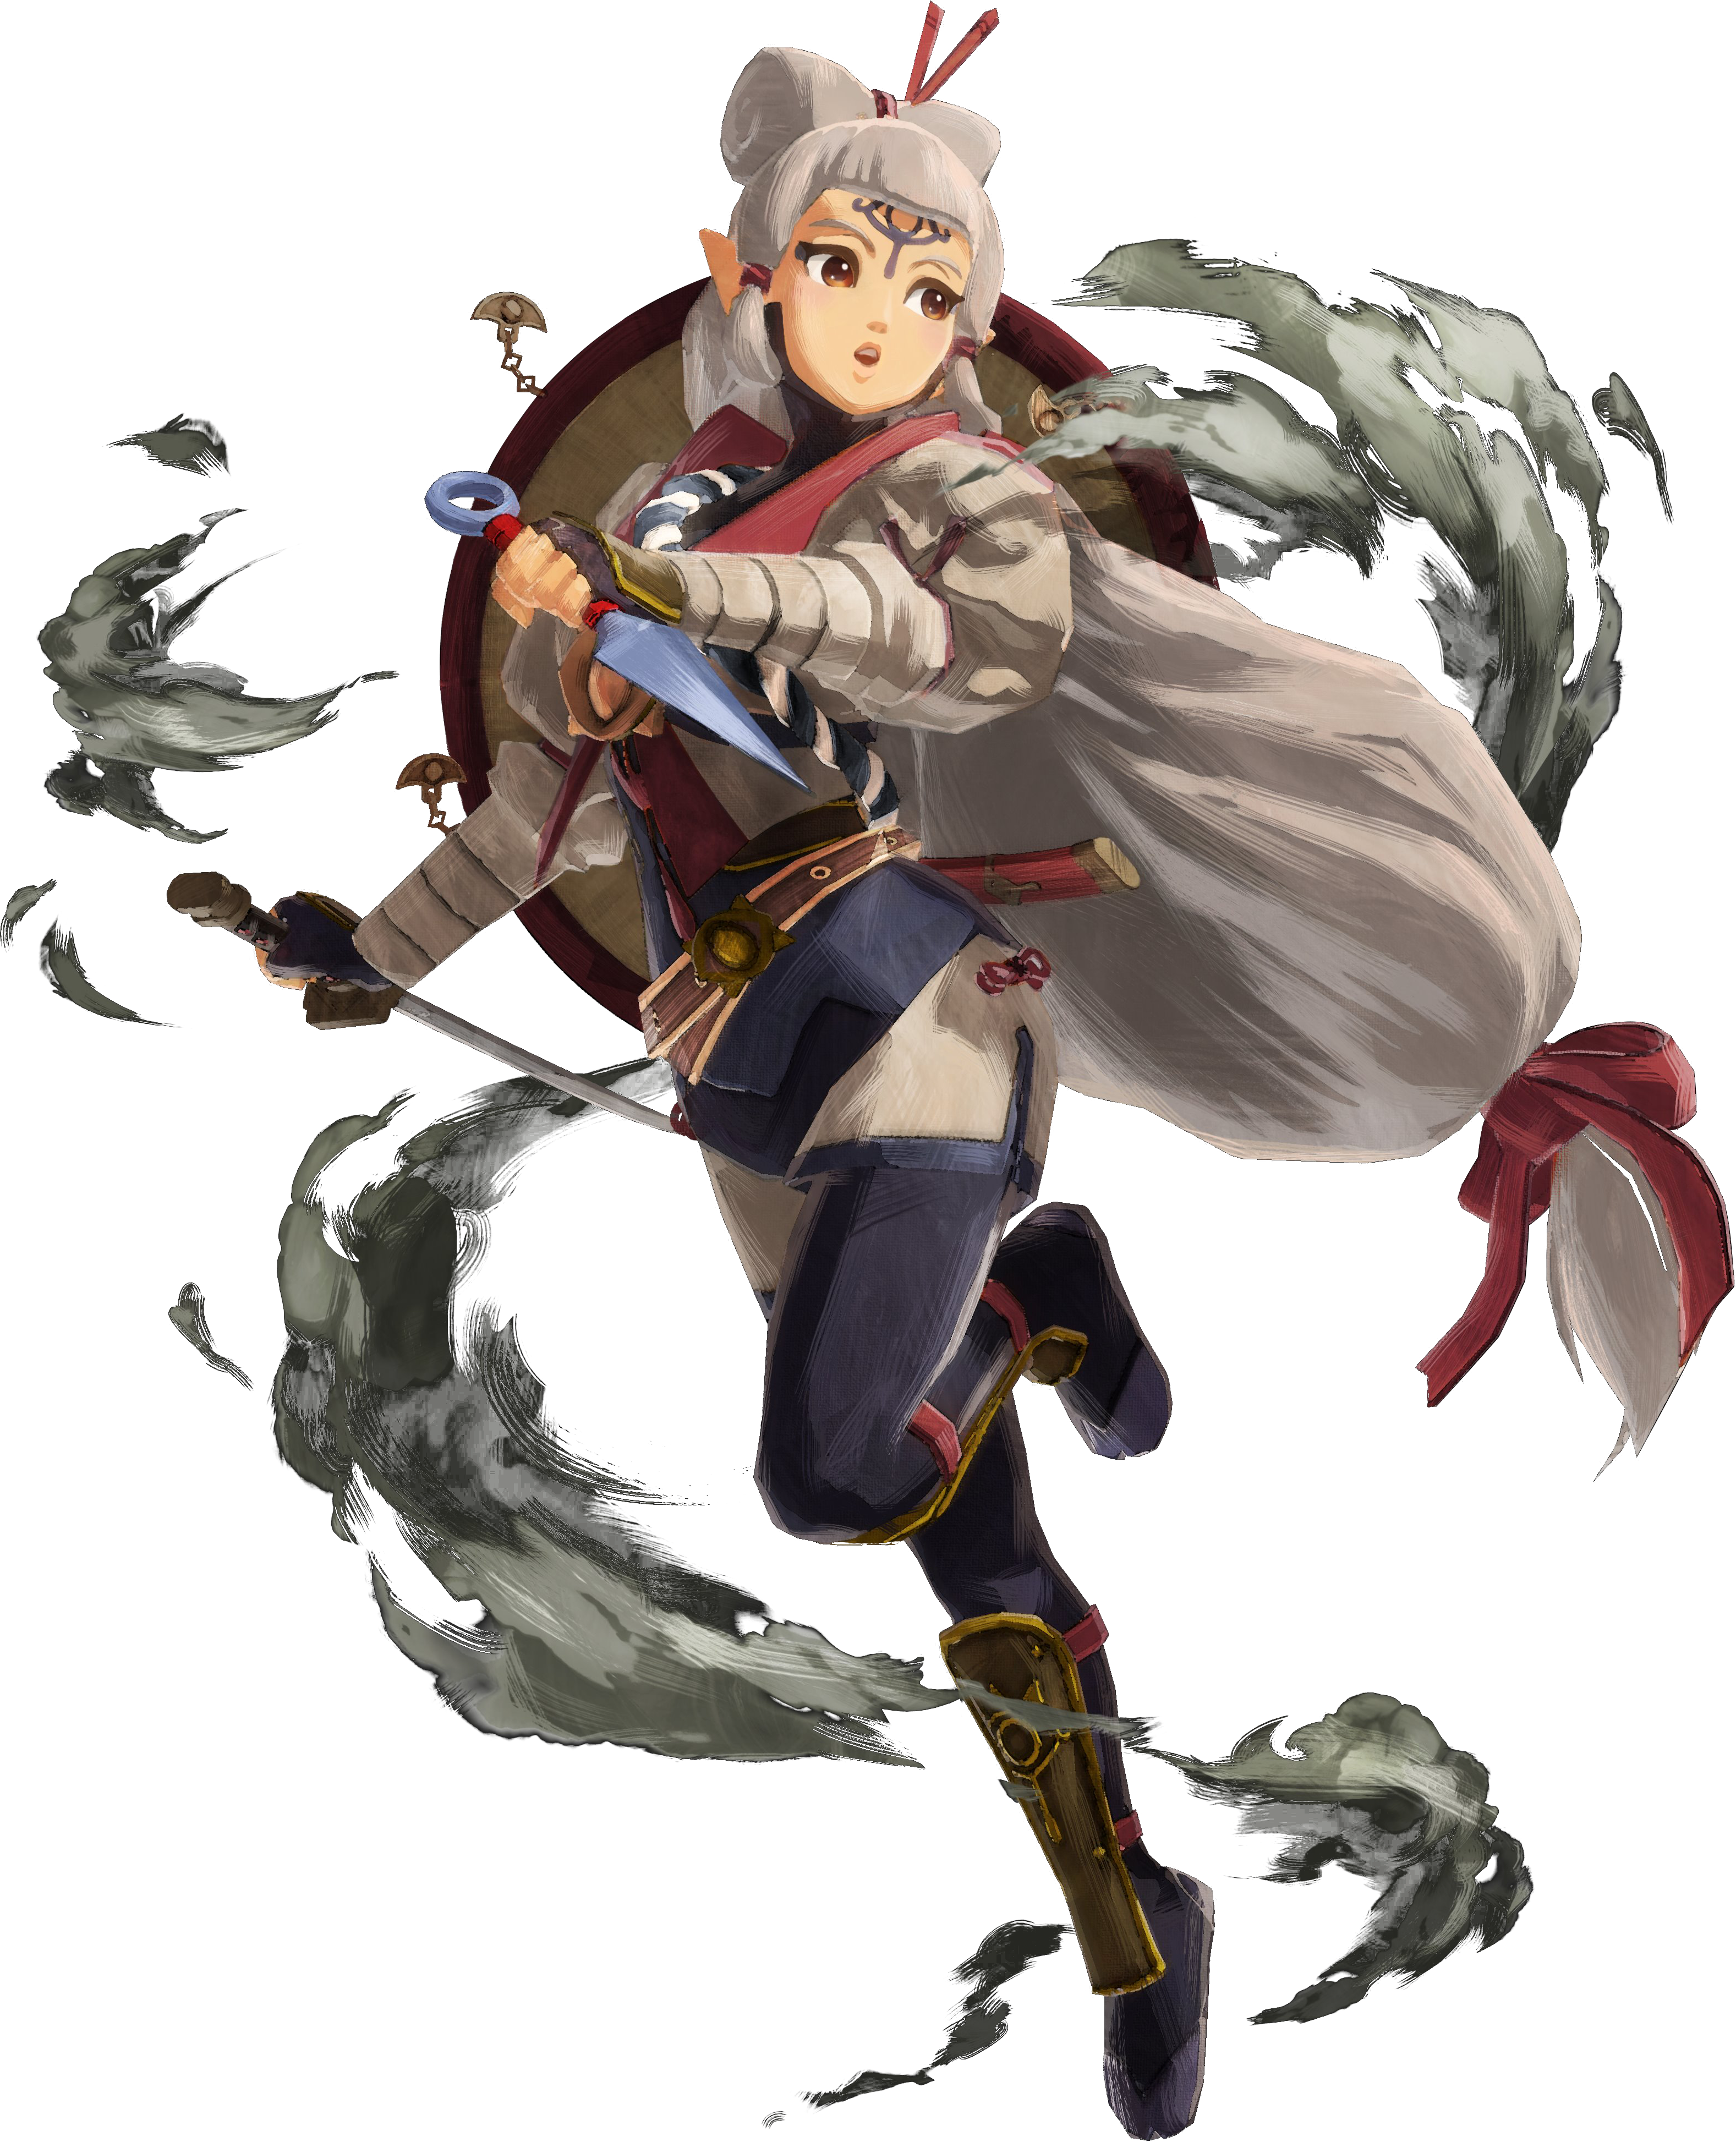
Age of Calamity[]
Impa is the loyal protector of Princess Zelda and younger sister of Purah. While her sister was focused on her research, Impa focused on her combat skills, acting as a bodyguard for Zelda. She strives to support and encourage Zelda as the princess struggles to unlock her sealing power. She quickly establishes a friendly rivalry with the time traveling Terrako.
After Link finds Terrako lying against a rock, Impa is calling for help as she is being pursued by Bokoblins hot on her trail, and she stumbles and the Sheikah Slate is sent flying, which caused Terrako to reactivate and the Sheikah Towers to rise which scares off her pursuers and surprises Link and Impa by their sudden appearance. They soon meet with Princess Zelda, whom Terrako immediately recognizes and runs up to her before Link catches it and noticed how it appears to know the princess. After their brief meeting with King Rhoam, Impa and the group head to Breach of Demise where the Royal Ancient Lab was located. During their journey, Harbinger Ganon, an entity that corrupted the past Terrako when it was pursuing the Terrako who was with the group, infects one of the Guardians and they are pursued by it, but with Terrako's power to activate the other Guardians, it managed to cause serious damage until they are able to defeat it. Link and his friends arrive at the lab where Purah and Robbie are scanning Terrako's memory banks with the Sheikah Slate and it reveals the horrors of Calamity Ganon's return. Despite being disturbed, Zelda is determined to stop Calamity Ganon at all costs.
It was then that they began recruiting the four Champions who will pilot the Divine Beasts to help beat back Calamity Ganon. In the meantime, Harbinger Ganon attempts to halt their progress by sending various monsters to attack Zora's Domain and Death Mountain, only to be successfully held off by Mipha and Daruk respectively. Harbinger Ganon led the attacks against Rito Village which led Revali and his countrymen to mistake Terrako for the Harbinger and attack Link and the party until Princess Zelda appeared and ended the brawl where after learning from Revali, Impa took interest on the subject of another Guardian like Terrako. Master Kohga disguised himself as Urbosa while she was away to manipulate the Gerudo into turning on Link, Impa, and Zelda and as they were cornered, Kohga attempts to strike them down until the real Urbosa returns and strikes him instead, forcing him to drop the act and summons the Yiga Clan to fight them. After they drove them out of town, Sooga takes Kohga out of the battle. After everything calms down, Urbosa tells the story of the Yiga Clan, whom are the Sheikah that have betrayed the Royal Family and they seek to resurrect Calamity Ganon, which has Impa feeling ashamed that some of her own kin have still held on to their hatred of the Royal Family for so long.
With the Champions gathered and the Divine Beasts calibrated, Impa tries to help encourage Zelda in regard to working on the Divine Beasts before leaving her alone on her deep thoughts. Impa stays at Hyrule Castle while the Champions head to Korok Forest to seek the Master Sword and to find the person worthy of wielding the sacred weapon, where they are guided by Hestu and they have encountered mysterious appearances of Malice caused by the seer, Astor and his Hollows, dark replicas of the chosen pilots. After Link retrieves it to save Zelda, they head back to Hyrule Castle. After some disruption, Link and the Champions are now given their titles as well as the blue cloths that confirm their status. After the ceremony ends, they hang out at the gazebo where Impa muses that they now have everything to stop Ganon until Terrako comes in to communicate with them. Slightly miffed, Impa attempts to scold it and gets her hand swatted away and she gets more annoyed each time as Zelda tries to pacify the situation. After being pushed too far, Impa had enough and starts chasing it. Eventually the scuffle up until they end up catching Revali in the middle of it, with the Rito losing his patience with them until he was forced to vacate the area in sheer disgust.
It wasn't too long before Impa tells King Rhoam that the latest information from Terrako has shown the exact date that Calamity Ganon will return, which happens to be on Zelda's returned birthday which has Rhoam resigned that time is not at their side and sends Zelda to two springs to train there in hopes it would do her some good. Zelda starts at the Spring of Courage and wears her white ceremonial robe as she prays there, but she was already too pessimistic about the outcome, even in spite of Impa's encouraging words to her. The spring is attacked by the monsters in the area, and they had to fight them off to protect Zelda during and after her training. Even when they end up becoming trapped by most of the directions by the monsters, the princess fortunately is knowledgeable of the relics and traps around the area, and they use them to hold them back and escape from the area. As Zelda remains doubtful, Impa continues to encourage her along with a poor attempt at humor which brings her back up for a time being.
As no one under the age of 17 is permitted to enter Mt. Lanayru, Zelda plans to head out on her birthday first thing in the morning as King Rhoam has his people evacuate the kingdom keep the number of casualties low and sent the soldiers to the garrisons of Akkala Citadel and Fort Hateno. Just as they depart however, Terrako, having escaped the lab after Purah, Robbie, and the authentic scientists were taken hostage is running at them frantically with the Sheikah Slate in tow which has the latest information on it. It was then that Calamity Ganon suddenly rises, which powers down the Sheikah Towers across Hyrule, which cuts off the Champions' contact with each other. They head back into Hyrule Castle as King Rhoam and several others are still trapped inside and tried to search for him. When the battle got too intense, they are forced to escape and one of the recently corrupted Guardians aim for them before being stunned by the king himself, who tells them to vacate the castle and reminds Link that his duty is to protect his daughter. Link was reluctant before taking the protesting princess out of the grounds as Rhoam was seemingly killed by the Guardians. Once they get into Hyrule Field, Impa shows Zelda the Sheikah Slate which shows of the Divine Beasts being attacked by Ganon. Zelda believes that the Champions have already been slain and sinks into despair over her perceived failure at accessing her power, until Terrako plays her lullaby and creates four Gates of Time which soar to the Divine Beasts. They saw that Divine Beast Vah Medoh's circuity is still giving off a blue glow which tells them that Revali is still hanging on for dear life while the Malice bleeding off its wing shows that he is in danger, and they realize that not all hope is lost, and they head out to take action before the worst takes effect.
In the Guardian of Remembrance DLC, Impa joins Link and Zelda along their journey to Mt. Lanayru through Lanayru Road's west gate so Zelda can train there with the help of the Hylian guards who were assigned to protect them during their trek to the mountain despite it being disrupted by Calamity Ganon's return, and unaware that King Rhoam and his guard had managed to live on and took a route different from theirs. While Zelda didn't have any success with gaining her power, she turns her attention to the Champion and the Divine Beasts.
With Terrako's Gates of Time bringing Sidon to Vah Ruta, Yunobo to Vah Rudania, Teba to Vah Medoh, and Riju to Vah Naboris to save the Champions from the Blight Ganons, Link and the group were given enough time to reach Vah Ruta and Vah Naboris where they saved Mipha and Urbosa by ending the threats, Waterblight Ganon and Thunderblight Ganon respectively. With the two of the girls still standing, they aid from the Divine Beasts to break down critical obstacles to help them reach Vah Rudania and Vah Medoh so they can help save Daruk and Revali by killing Fireblight Ganon and forcing Windblight Ganon into retreat, effectively protecting the boys. Revali and Teba would eventually slay Windblight Ganon while they defend Western Hyrule from the surge of Guardians in their way. With the Divine Beasts remaining under the Champions' control and the Champions themselves surviving, Zelda recalls Sidon's account of how he got into Vah Ruta when he saved his sister from imminent death, and she realized that Terrako was responsible for those events and thanks it before they head out to Akkala Citadel.
With the Divine Beasts staying on their side, they were given more advantage as they arrive at the besieged Akkala Citadel to help successfully protect it with the help of Vah Ruta's power, Mipha's healing ability, and Daruk's reinforcements as the Hylian soldiers, with Robbie who has escaped the Yiga Clan's grip, break down the only bridge with cannons to make the crossing Malice Guardians fall below. During the fight to keep Fort Hateno from falling as well, Link, Impa, and Zelda arrive at the fortress where Astor was waiting for them with the resurrected Blight Ganons at his side. Link fights all four of them as Impa takes Zelda away from the fortress, but the princess, still haunted by the fate of her father, pulls free of Impa's grip, to the latter's shock, and runs back towards Link and in a stroke of fortune, her power had finally emerged, stunning the Blights and shutting down the surrounding Guardians. The battle resumes and Purah, who also escaped somehow, installs a failsafe and had the group defend her from the Blight Ganons along the way and she was able to get it working, disabling most of the Guardians which made up Ganon's main unit, giving Hyrule the advantage. Princess Zelda takes command of the surviving troops and rallies them to not give into despair and to take back Hyrule by any means possible. During their journey back, a guard was escorting them before he reveals himself as Master Kohga. Due to Astor's betrayal by using the Yiga Clan as blood sacrifices to revive the Blights and Sooga's fate remaining a mystery, he and the surviving members have resolved to side with Hyrule to get revenge on them for their slaughtered comrades. With the help of Kohga and the Yiga Clan, they managed to defend the Great Plateau where Impa tells Zelda that someone is waiting for her at the Temple of Time. Upon arrival, that someone is revealed to be her father, Rhoam who was able to live thanks to the device she gave him which was an Ancient Guardian Shield, and it was there that they finally mended their strained relationship. He then turns his attention to his troops and tells them that their objective now is to lay siege on Hyrule Castle and take it back.
Purah managed to restore the Sheikah Towers and powers them to the max to summon the forces of every race across Hyrule, including the Champions, present and future, and their Divine Beasts and they all express optimism at how well things are going for them now than they were initially and prepare to attack Hyrule Castle. With her father's blessing, Princess Zelda takes command and reminds the united troops that Hyrule is their home that they must protect and as long as they are united and not divided, they cannot be stopped. They take control of the outposts and kill the monsters upholding Ganon's barrier around the castle so the Champions can open fire at it. Despite the Blood Moon's presence reviving the monsters, they managed to push their way through.
They managed to breach the castle with Zelda leading the ground troops and Revali and Teba leading the aerial army storming in as Astor and Harbinger Ganon confronts them as the mad prophet rants that it was his fate to crush them all. They managed to defeat the Blight Ganons for good and they also beat the villainous duo at their own game for the last time. Outraged by this, Astor orders Harbinger Ganon to devour them, but Ganon doesn't take orders from mortals as Sooga forewarned and devours him instead to take on a new form. Terrako is corrupted by the Malice, and they are forced to fight it. With Terrako badly damaged, the Champions catch up to have a moment of silence with the princess as she becomes more determined to stop Ganon once and for all and they rush upstairs to the Sanctum where it awaited them. Calamity Ganon initially shrugged off their attacks easily which has Zelda resorting to using her power to try and defeat it. It brings Terrako back up and races upstairs to jump between her and Ganon, destroying itself to utterly raze Ganon's invincibility allowing the warriors to take the fight to it. With Ganon wounded, Link uses the Master Sword to cripple it even further for Princess Zelda to use her holy power to finally destroy Ganon for good.
With Calamity Ganon vanquished, his Malice is also destroyed and Hyrule managed to remain standing despite the damage that needs to be repaired and cleaned up. The Champions have a moment to enjoy the newfound peace they worked to restore until Terrako's blessed screw glows and sends the future warriors back home, but not before the Champions say good-bye to them and they look on to a much brighter future than ever before. Because Terrako was responsible for the outcome brought to the kingdom currently on the mend, the warriors search for Terrako's fifty components and took them to the Royal Ancient Lab. Terrako was unresponsive which has everyone concerned about its state as Revali points out that it's still stretching out its nap as Impa agrees with him and tries to wake it up by smacking it until Zelda tells her to stop and steps in front of it. Terrako managed to become fully functional again as everyone sighs in relief as it reunites with the princess. During Terrako's travels, it meets with Impa and it swats her hand again as it passes by before meeting with everyone at Hyrule Castle where Daruk pulls the Champions in for a group hug.
In the secret DLC ending, Impa is inside Hyrule Castle as it meets with Terrako and in a surprising turn of events, it lets her touch its claw without swatting it away this time, which leaves her surprised and happy at the fact that they are starting to get along better. She is seen commuting with the other present and future Champions as Terrako joins in and amuses them. The final scene has everyone at the Sheikah Tower, with the Champions back in their original attires as Impa asks the princess if she plans on going through with it, and Zelda confirms so as she takes off on a paraglider with Terrako joining her as they admire the scenery that they helped preserve and their efforts in defending it have not been in vain.
Character Information[]
Personality[]
The steadfast Impa cares little for her own well-being in her tireless efforts to protect the royal family. She will always protect Princess Zelda, even if it means risking her own life for the Princess and for Hyrule.
Quotes[]
- See also: Impa/Quotes
Gameplay[]
| Keys: | Y Normal Attack ▲ | X Charge Attack ▲ | A Special Technique ▲ | B Evade |
Hyrule Warriors[]
If Impa ever finds her self in the air, pressing Y while in the air will cause her to perform an upwards drilling attack with her sword. Pressing X will cause her to perform a powerful vertical spinning slash as she descends to the ground. Enemies are knocked back upon hitting the ground.
- X: Impa dashes forward quickly, ramming enemies in her path.
- Y, X: Impa jumps into the air with an uppercut slash. Can be extended by pressing X'.
- Y, Y, X: Impa flips and slams the sword in front.
- Y, Y, Y, X: Impa extends her arm, generating a sphere of water, trapping several enemies before slashing the sphere diagonally upward to the left, causing the sphere to explode and send enemies flying.
- Y, Y, Y, Y, X: Impa jumps into the air and makes giant knives made of water rain down onto enemies.
- Y, Y, Y, Y, Y, X: Impa knocks her sword into the air, makes illusionary swords fall onto a symbol, and uses them to deal several forward slashes before getting her own sword back.
- Y, Y, Y, Y, Y, Y, Y: Performs a series of powerful slashing attacks that deal heavy damage to enemies at close to mid ranged enemies, finishes by leaping into the air and drilling her sword down onto the ground.
- A: Impa holds her sword and sheath at her side in a classic Iaijutsu stance, before drawing the large blade and performing a large sweeping slash in front of her, and then resheathing her sword into her sheath that's now back on her back.
- Focus Spirit + A: Impa kicks her still sheathed sword into the air, then caches it mounting it on her right shoulder, slowing drawing the blade, and then quickly swinging it. The slash sends out a projectile energy wave that detonates when Impa resheaths her blade in classic Iaijutsu fashion.
- Focus Spirit Finisher: Jumps up into the air, charges her sword with energy, then slashes downwards with a circular sweeping strike, forming a dome of energy around her.
- Weak Point Smash: Impa slashes the ground just before the enemy, and causes a water geyser to erupt between herself and her foe.
- X: Twirls her weapon then throws it forward, creating a wall of flame that persists for approximately 6 seconds that damages and knocks away all foes who touch it.
- Y, X, X, X: Slashes to the upper left, knocking foes into the air. Spins her blade overhead several times, juggling the airborne foes. Throws her blade into the airborne foes, where it explodes and knocks them away.
- Y, Y, X, X, X: Throws her spinning blade forward where it hovers in place, then leaps forward and grabs it. Plants her blade into the ground, then performs a circular spin kick from it. Leaps into the air and then throws the blade into the ground, causing a shockwave that has knockback.
- Y, Y, Y, X, X, X: Stabs her blade into the ground, causing four pillars of fire to appear around her. Four flame naginatas appear out of the flaming pillars. Very rapidly, she darts into the air, grabbing each of them one-by-one and throwing them into the ground in the center, causing a large explosion that has knockback.
- Y, Y, Y, Y, X: She splits her blade into two flaming naginatas, slashes once, then throws them forward to the ground where they generate a large, wide explosion.
- Y, Y, Y, Y,Y: Impa strikes from the right to the left, then performs a double attack consisting of a spin on the right side with a slash to the left. With a forceful slash upward, Impa then lunges forward while spinning her Naginata overhead. With a leap, Impa chucks the mighty weapon forward to create a fiery blast.
- A: Generates a massive glyph on the ground in front of her that draws enemies in. Six giant naginata blades then rise up from the ground and crash inward, destroying all foes trapped within the glyph. The summoned blades match whatever naginata Impa is equipped with.
- Focus Spirit + A: Impa summons a flaming serpentine dragon that charges forward at enemies.
- Focus Spirit Finisher: Impa stabs the naginata into the ground, creating a circular explosion around her that knocks back enemies.
- Weak Point Smash:Slashes the ground in front of her with the naginata to create a rupture, then causes the rupture to explode with fire.
In contrast to the Giant Blade, the Naginata is imbued with the element of fire and focuses on rapid strikes to blindside the enemy. Impa can use this weapon to conjure blades from the ground or manipulate fire to burn surrounding enemies.
- The eye symbol used by the Sheikah manifests itself when Impa causes large blades to rise up within a magic circle.
Age of Calamity[]
- Y, Y, Y, Y, Y, Y, Y:
- Dash + Y: Impa comes to a halt while slashing forward.
- X: Teleports to an enemy for a slash, then stabs them.
- Dash + X: Impa spins around and throws her hat around her.
- Y, X: Impa throws out exploding kunai that launch her airborne, setting her up for aerial attacks.
- Y, Y, X:
- Y, Y, Y, X:
- Y, Y, Y, Y, X:
- Y, Y, Y, Y, Y, X:
- Air + Y, Y, Y: Impa performs three spinning attacks.
- Air + X: Impa teleports before slamming enemies down.
- Cryonis: Impa raises an ice block, then rides it while damaging enemies.
- Stasis: Impa freezes enemies in place before rapidly slashing at them with X. She can dodge cancel the animation.
- Magnesis: Impa forms a hammer with various enemy weapons near her.
- Remote Bomb: Impa forms a vortex before unleashing a bomb.
- ZR: Impa tags an enemy with a Sheikah symbol. By absorbing that symbol with a strong attack or otherwise defeating the enemy, she can summon phantom copies of herself that can increase her damage output and range for 40 seconds.
- A: Impa performs several ninja hand gestures before unleashing a barrel bomb on her opponent. If she is fully charged up with absorbing Sheikah symbols, she slashes her target, her phantom copies stack several of the barrels together into a tower afterwards, and when Impa reappears and sheathes her knife, the bombs detonate on cue with her saying "It's time!"
Weapons[]
| Weapon Information (Element: Water) | ||
|---|---|---|
| Description: A sword created by the finest Goron smithy who ever lived. It slices deep but requires immense strength to wield. Press the Strong Attack button to quickly dash into enemies. | ||
| Giant's Knife | Skill Slots: 1~2 | |

|
Base Attack: 80 | 1★ Attack: 88 |
| 2★ Attack: 96 | 3★ Attack: 104 | |
| 4★ Attack: 112 | 5★ Attack: 120 | |
| Biggoron's Knife | Skill Slots: 3~4 | |

|
Base Attack: 150 | 1★ Attack: 165 |
| 2★ Attack: 180 | 3★ Attack: 195 | |
| 4★ Attack: 210 | 5★ Attack: 225 | |
| Biggoron's Sword | Skill Slots: 6~8 | |

|
Base Attack: 280 | 1★ Attack: 308 |
| 2★ Attack: 336 | 3★ Attack: 364 | |
| 4★ Attack: 392 | 5★ Attack: 420 | |
| 8-Bit Boomerang? (HW) | Skill Slots: 6~8 | |

|
Base Attack: 280 | 1★ Attack: 308 |
| 2★ Attack: 336 | 3★ Attack: 364 | |
| 4★ Attack: 392 | 5★ Attack: 420 | |
| Biggoron's Sword + (Legends) | Skill Slots: 7~8 | |
|
|
Base Attack: 500 | 1★ Attack: 550 |
| 2★ Attack: 600 | 3★ Attack: 650 | |
| 4★ Attack: 700 | 5★ Attack: 750 | |
| Biggoron's Sunblade (Legends) | Skill Slots: 7~8 | |
|
|
Base Attack: 500 | 1★ Attack: 550 |
| 2★ Attack: 600 | 3★ Attack: 650 | |
| 4★ Attack: 700 | 5★ Attack: 750 | |
| Secondary Element: Light | ||
Sheaths[]
.png "Giant Blade Sheath 1 (HW).png (105 KB)")
.png "Giant Blade Sheath 2 (HW).png (150 KB)")
.png "Giant Blade Sheath 3 (HW).png (149 KB)")
.png "Giant Blade Sheath 4 (HW).png (106 KB)")
.png "Giant Blade Sheath 5 (HWL).png (51 KB)")
- The first weapon is named after the Giant's Knife.
- The third weapon is both based on and named after the Biggoron's Sword.
| Weapon Information (Element: Fire) | ||
|---|---|---|
| Description: A naginata enchanted with fire, handed down in the Sheikah tribe for generations. Use the Strong Attack button to create a wall of flame in front of you that can halt an enemy in its tracks! | ||
| Guardian Naginata | Skill Slots: 1~2 | |

|
Base Attack: 80 | 1★ Attack: 88 |
| 2★ Attack: 96 | 3★ Attack: 104 | |
| 4★ Attack: 112 | 5★ Attack: 120 | |
| Scorching Naginata | Skill Slots: 3~4 | |

|
Base Attack: 150 | 1★ Attack: 165 |
| 2★ Attack: 180 | 3★ Attack: 195 | |
| 4★ Attack: 210 | 5★ Attack: 225 | |
| Sheikah Naginata | Skill Slots: 6~8 | |
|
Base Attack: 280 | 1★ Attack: 308 |
| 2★ Attack: 336 | 3★ Attack: 364 | |
| 4★ Attack: 392 | 5★ Attack: 420 | |
| 8-Bit Magical Sword? (HW) | Skill Slots: 6~8 | |

|
Base Attack: 280 | 1★ Attack: 308 |
| 2★ Attack: 336 | 3★ Attack: 364 | |
| 4★ Attack: 392 | 5★ Attack: 420 | |
| Sheikah Naginata + (Legends) | Skill Slots: 7~8 | |
|
|
Base Attack: 500 | 1★ Attack: 550 |
| 2★ Attack: 600 | 3★ Attack: 650 | |
| 4★ Attack: 700 | 5★ Attack: 750 | |
| Crackling Naginata (Legends) | Skill Slots: 7~8 | |
|
|
Base Attack: 500 | 1★ Attack: 550 |
| 2★ Attack: 600 | 3★ Attack: 650 | |
| 4★ Attack: 700 | 5★ Attack: 750 | |
| Secondary Element: Lightning | ||
Badge Materials[]
- See also: Hyrule Warriors/Badges
| Badge | Materials | ||
|---|---|---|---|
| Kokiri Sword I | Metal Plate (1x) | ||
| Kokiri Sword II | Piece of Darknut Armor (1x) | Metal Plate (1x) | |
| Kokiri Sword III | Goron Armor Breastplate (1x) | Metal Plate (1x) | |
| Kokiri Sword IV | ReDead Bandage (1x) | Metal Plate (1x) | |
| Wooden Sword I | Metal Plate (1x) | ||
| Wooden Sword II | Fiery Aeralfos Leather (1x) | Metal Plate (1x) | |
| Wooden Sword III | ReDead Bandage (1x) | Metal Plate (1x) | |
| Wooden Sword IV | Shield Moblin Helmet (1x) | Metal Plate (1x) | |
| Stamina Fruit I | Big Poe Necklace (1x) | ||
| Stamina Fruit II | Lana's Hair Clip (1x) | Wizzro's Robe (1x) | Big Poe Necklace (3x) |
| Stamina Fruit III | Lana's Cloak (1x) | Wizzro's Robe (2x) | Big Poe's Lantern (2x) |
| Digging Mitts I | Big Poe Necklace (3x) | ||
| Digging Mitts II | Lana's Hair Clip (1x) | Wizzro's Robe (1x) | Big Poe Necklace (3x) |
| Digging Mitts III | Lana's Cloak (1x) | Wizzro's Robe (2x) | Big Poe's Lantern (2x) |
| Din's Fire I | Goron Armor Breastplate (1x) | Metal Plate (1x) | |
| Din's Fire II | ReDead Bandage (1x) | Metal Plate (1x) | |
| Din's Fire III | Lana's Cloak (1x) | Wizzro's Robe (2x) | Big Poe's Lantern (2x) |
| Hover Boots I | Big Poe Necklace (3x) | ||
| Hover Boots II | Lana's Hair Clip (1x) | Wizzro's Robe (1x) | Big Poe Necklace (3x) |
| Hover Boots III | Lana's Cloak (1x) | Wizzro's Robe (2x) | Big Poe's Lantern (2x) |
| Fierce Deity's Mask I | Stalmaster Wrist Bone (1x) | Metal Plate (1x) | |
| Fierce Deity's Mask II | Lana's Cloak (1x) | Wizzro's Robe (2x) | Big Poe's Lantern (2x) |
| Badge | Materials | ||
|---|---|---|---|
| Empty Bottle I | Old Rag (1x) | ||
| Empty Bottle II | ReDead Bandage (1x) | Old Rag (1x) | |
| Empty Bottle III | Wizzro's Ring (1x) | Lana's Hair Clip (2x) | Big Poe's Lantern (2x) |
| Hornet Larvae I | Big Poe Necklace (1x) | ||
| Hornet Larvae II | Lana's Hair Clip (1x) | Wizzro's Robe (1x) | Big Poe Necklace (3x) |
| Hornet Larvae III | Wizzro's Ring (1x) | Lana's Hair Clip (2x) | Big Poe's Lantern (2x) |
| Nayru's Love I | Big Poe Necklace (3x) | ||
| Nayru's Love II | Lana's Hair Clip (1x) | Wizzro's Robe (1x) | Big Poe Necklace (3x) |
| Nayru's Love III | Wizzro's Ring (1x) | Lana's Hair Clip (2x) | Big Poe's Lantern (2x) |
| Goron Tunic I | Big Poe Necklace (2x) | ||
| Goron Tunic II | Lana's Hair Clip (1x) | Wizzro's Robe (1x) | Big Poe Necklace (3x) |
| Goron Tunic III | Wizzro's Ring (1x) | Lana's Hair Clip (2x) | Big Poe's Lantern (2x) |
| Zora Tunic I | Big Poe Necklace (2x) | ||
| Zora Tunic II | Lana's Hair Clip (1x) | Wizzro's Robe (1x) | Big Poe Necklace (3x) |
| Zora Tunic III | Wizzro's Ring (1x) | Lana's Hair Clip (2x) | Big Poe's Lantern (2x) |
| Magic Armor I | Big Poe Necklace (2x) | ||
| Magic Armor II | Lana's Hair Clip (1x) | Wizzro's Robe (1x) | Big Poe Necklace (3x) |
| Magic Armor III | Wizzro's Ring (1x) | Lana's Hair Clip (2x) | Big Poe's Lantern (2x) |
| Sacred Shield I | Big Poe Necklace (2x) | ||
| Sacred Shield II | Lana's Hair Clip (1x) | Wizzro's Robe (1x) | Big Poe Necklace (3x) |
| Sacred Shield III | Wizzro's Ring (1x) | Lana's Hair Clip (2x) | Big Poe's Lantern (2x) |
| Mirror Shield I | Big Poe Necklace (2x) | ||
| Mirror Shield II | Lana's Hair Clip (1x) | Wizzro's Robe (1x) | Big Poe Necklace (3x) |
| Mirror Shield III | Wizzro's Ring (1x) | Lana's Hair Clip (2x) | Big Poe's Lantern (2x) |
| Badge | Materials | ||
|---|---|---|---|
| Farore's Wind I | Monster Tooth (1x) | ||
| Farore's Wind II | Lana's Hair Clip (1x) | Wizzro's Robe (1x) | Big Poe Necklace (3x) |
| Farore's Wind III | Lana's Cloak (1x) | Lana's Hair Clip (2x) | Big Poe's Lantern (2x) |
| Goron's Bracelet I | Big Poe Necklace (2x) | ||
| Goron's Bracelet II | Lana's Cloak (1x) | Lana's Hair Clip (2x) | Big Poe's Lantern (2x) |
| Hawkeye I | Big Poe Necklace (2x) | ||
| Hawkeye II | Lana's Cloak (1x) | Lana's Hair Clip (2x) | Big Poe's Lantern (2x) |
| Beetle I | Big Poe Necklace (2x) | ||
| Beetle II | Lana's Cloak (1x) | Lana's Hair Clip (2x) | Big Poe's Lantern (2x) |
| Whip I | Big Poe Necklace (2x) | ||
| Whip II | Lana's Cloak (1x) | Lana's Hair Clip (2x) | Big Poe's Lantern (2x) |
Gallery[]
.png "Impa Concept (HW).png (369 KB)")
.png "Impa Concept Art (HW).png (805 KB)")
.png "Impa Concept Art 2 (HW).png (363 KB)")
")
.png)
")
.png)
")
")
.png "Impa Alternate Costume (HWL).png (18 KB)")
.png "Impa Alternate Costume 2 (HWL DLC).png (16 KB)")
.png "Impa Alternate Costume 3 (HWL DLC).png (27 KB)")
.png)
")
")
")
")
")
プレイムービー (18 KB)")
プレイムービー (16 KB)")
External Links[]
| Hyrule Warriors • Legends • Definitive Edition • Hyrule Warriors: Age of Calamity |
| Characters |
| Hyrule Warriors |
| Link • Impa • Sheik • Lana • Princess Zelda • Ganondorf • Darunia • Princess Ruto • Agitha • Midna • Zant • Fi • Ghirahim • Cia • Volga • Wizzro • Twili Midna • Young Link • Tingle • Ganon • Cucco |
| Hyrule Warriors Legends |
| Linkle • Skull Kid • Toon Link • Tetra • King Daphnes • Medli • Marin • Toon Zelda • Ravio • Yuga |
| Hyrule Warriors Age of Calamity |
| Urbosa • Mipha • Daruk • Revali • Hestu • Sidon • Yunobo • Teba • Riju • Maz Koshia • Master Kohga • King Rhoam • Great Fairies • Terrako |
| EX: Pulse of the Ancients |
| Battle-Tested Guardian |
| EX: Guardian of Remembrance |
| Sooga • Purah & Robbie |
| Bosses |
| King Dodongo • Gohma • Manhandla • Argorok • The Imprisoned • Ganon • Great Fairy Helmaroc King • Phantom Ganon • Astor |
| Locations |
| Hyrule Warriors |
| Hyrule Field • Eldin Caves • Faron Woods • Valley of Seers • Death Mountain • Lake Hylia • Twilight Field • Palace of Twilight • Skyloft • Sealed Grounds • Temple of the Sacred Sword • Temple of Souls • Gerudo Desert • Ganon's Tower |
| Hyrule Warriors Legends |
| Forsaken Fortress • Wind and Earth Temples |
| Hyrule Warriors Age of Calamity |
| Breach of Demise • Zora's Domain • Tabantha Frontier • Gerudo Town • Hyrule Outpost • Great Hyrule Forest • Cenel Peak • Akkala Citadel • Yiga Clan Hideout • Damel Forest • Hyrule Castle • Lanayru Wetlands • Hyrule Ridge • Fort Hateno • Great Plateau • Hyrule Castle Town |
| EX: Guardian of Remembrance |
| Goponga Village • Kakariko Village • Lanayru Road • Mount Daphnes |
| Features |
| Items • Adventure Mode • Unit Types • Potion Mixtures • Badges • Materials • Weapon Skills • My Fairy |