| Mahoraga | |
 | |
| Allegiance(s): | Devil Eight
|
| Element: | Water
|
| Weapon(s): | Bow and arrows
|
| Real form: | Giant brightly colored serpent with wings
|
| Real name: | Mahoraga
|
| Chinese name: | 摩睺羅伽
|
| Also known as: | Móhóuluójiā
Magoraga or Makoraga |
| Divine name(s): | n/a
|
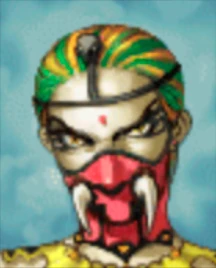
Mahoraga (マハラカ, Maharaka) is a secondary antagonist in Saiyuki: Journey West. He is the first member of the Devil Eight to encounter Sanzo's party. He was formerly a renowned snake god before he converted as a Devil.
In Hinduism and Buddhism, a Mahoraga is a type of dharmapala -wrathful entity- who serves under Gautama Buddha. Together with Kimnara and the members of Sakra's family, Mahoragas are gods of music. Their bodies resemble humans except they have a cobra or python's neck and head. Though recognized as snake gods, they are said to be a genus of dragons.
Role in Game[]
Sanzo meets Mahoraga in a dream world created by him. Mahoraga calls himself the Dream Master and is happy to have found Lady Kannon's staff easily. He hits a dryad and tells Sanzo to free the Guardian and give him the staff. Sanzo refuses and Mahoraga attacks him. Mahoraga leaves before his world breaks. Sanzo is worried about Mahoraga's knowledge of the staff and Guardians.
Mahoraga makes Kid Pyric his pawn and gives him some Devil's powers. He wants to use Pyric against Sanzo. Mahoraga confronts Sanzo at Mount Stone but loses and goes back to Heaven. He is hurt badly and asks to keep his defeat a secret from Asura. Deva lets Garda heal him. Mahoraga is not in the story anymore.
Personality[]
Mahoraga, a cold and shameless devil, takes great pleasure in his immortal powers and is driven by a relentless desire to establish himself as a formidable entity. Despite technically belonging to the dragon species, he harbors a conceited belief that his race surpasses their origins. Upon overhearing Nagini expressing her dissatisfaction to Deva regarding their inability to retrieve Sanzo's staff, Mahoraga is deeply offended by the dragon's failure to acknowledge him as a significant contender for the task. Consequently, he nurtures a deep-seated resentment towards Nagini and devises a plan to demonstrate his superiority over her in every aspect. However, his scheme ultimately backfires, leading to his humiliation, and his pride prevents him from accepting Nagini's compassionate offer to heal him.
Fighting Style[]
Mahoraga's fighting grounds heavily favor his long-range tactics. He stands high on a tall pedestal and shoots poisonous arrows at Sanzo's party. His minions guard the rising stones, also shooting arrows to slow down the players. Mahoraga rarely moves, so the party must find a way to reach him.
Players can use Goku's Cloud ability or Ryorin's Wereform to quickly reach Mahoraga in one or two turns. Once there, they can unleash their strongest attacks to defeat him swiftly. However, they need to be cautious as other monsters may target them and cause rapid health loss. To support the team effectively, players may want to hold back their flying characters while the rest of the party makes their way through the pedestals. Once the rest of the party is within range, the flying characters can help eliminate the monsters blocking the longer path.
In Mahoraga's second encounter, the terrain is distorted and jagged, making movement difficult for many characters. The floating serpent can move four spaces in any direction to avoid the terrain effects. He can also use damaging water magic and has a chance of poisoning Sanzo's party. His monsters have long-range magic to keep the players' characters at a distance.
Even so, the players can also use the terrain to their advantage. They may retreat to either corners of the map and merely wait for the monsters to come to them. If they choose to focus on defense, the party can defeat each villain individually until the boss remains. Mahoraga's attacks maybe a hindrance if he floats closer to ally members, but they are not too damaging for even low-leveled characters. The hardest part of the battle may be dealing the final blow to him, as he may evade for quite some time if the player's formation has a single opening for escapes.
Both of his battles contain the Emperor's armor as treasures on the map, which are strong pieces of equipment. They are also required if the player wants to obtain the Emperor Guardian later in the game.
Gallery[]
")