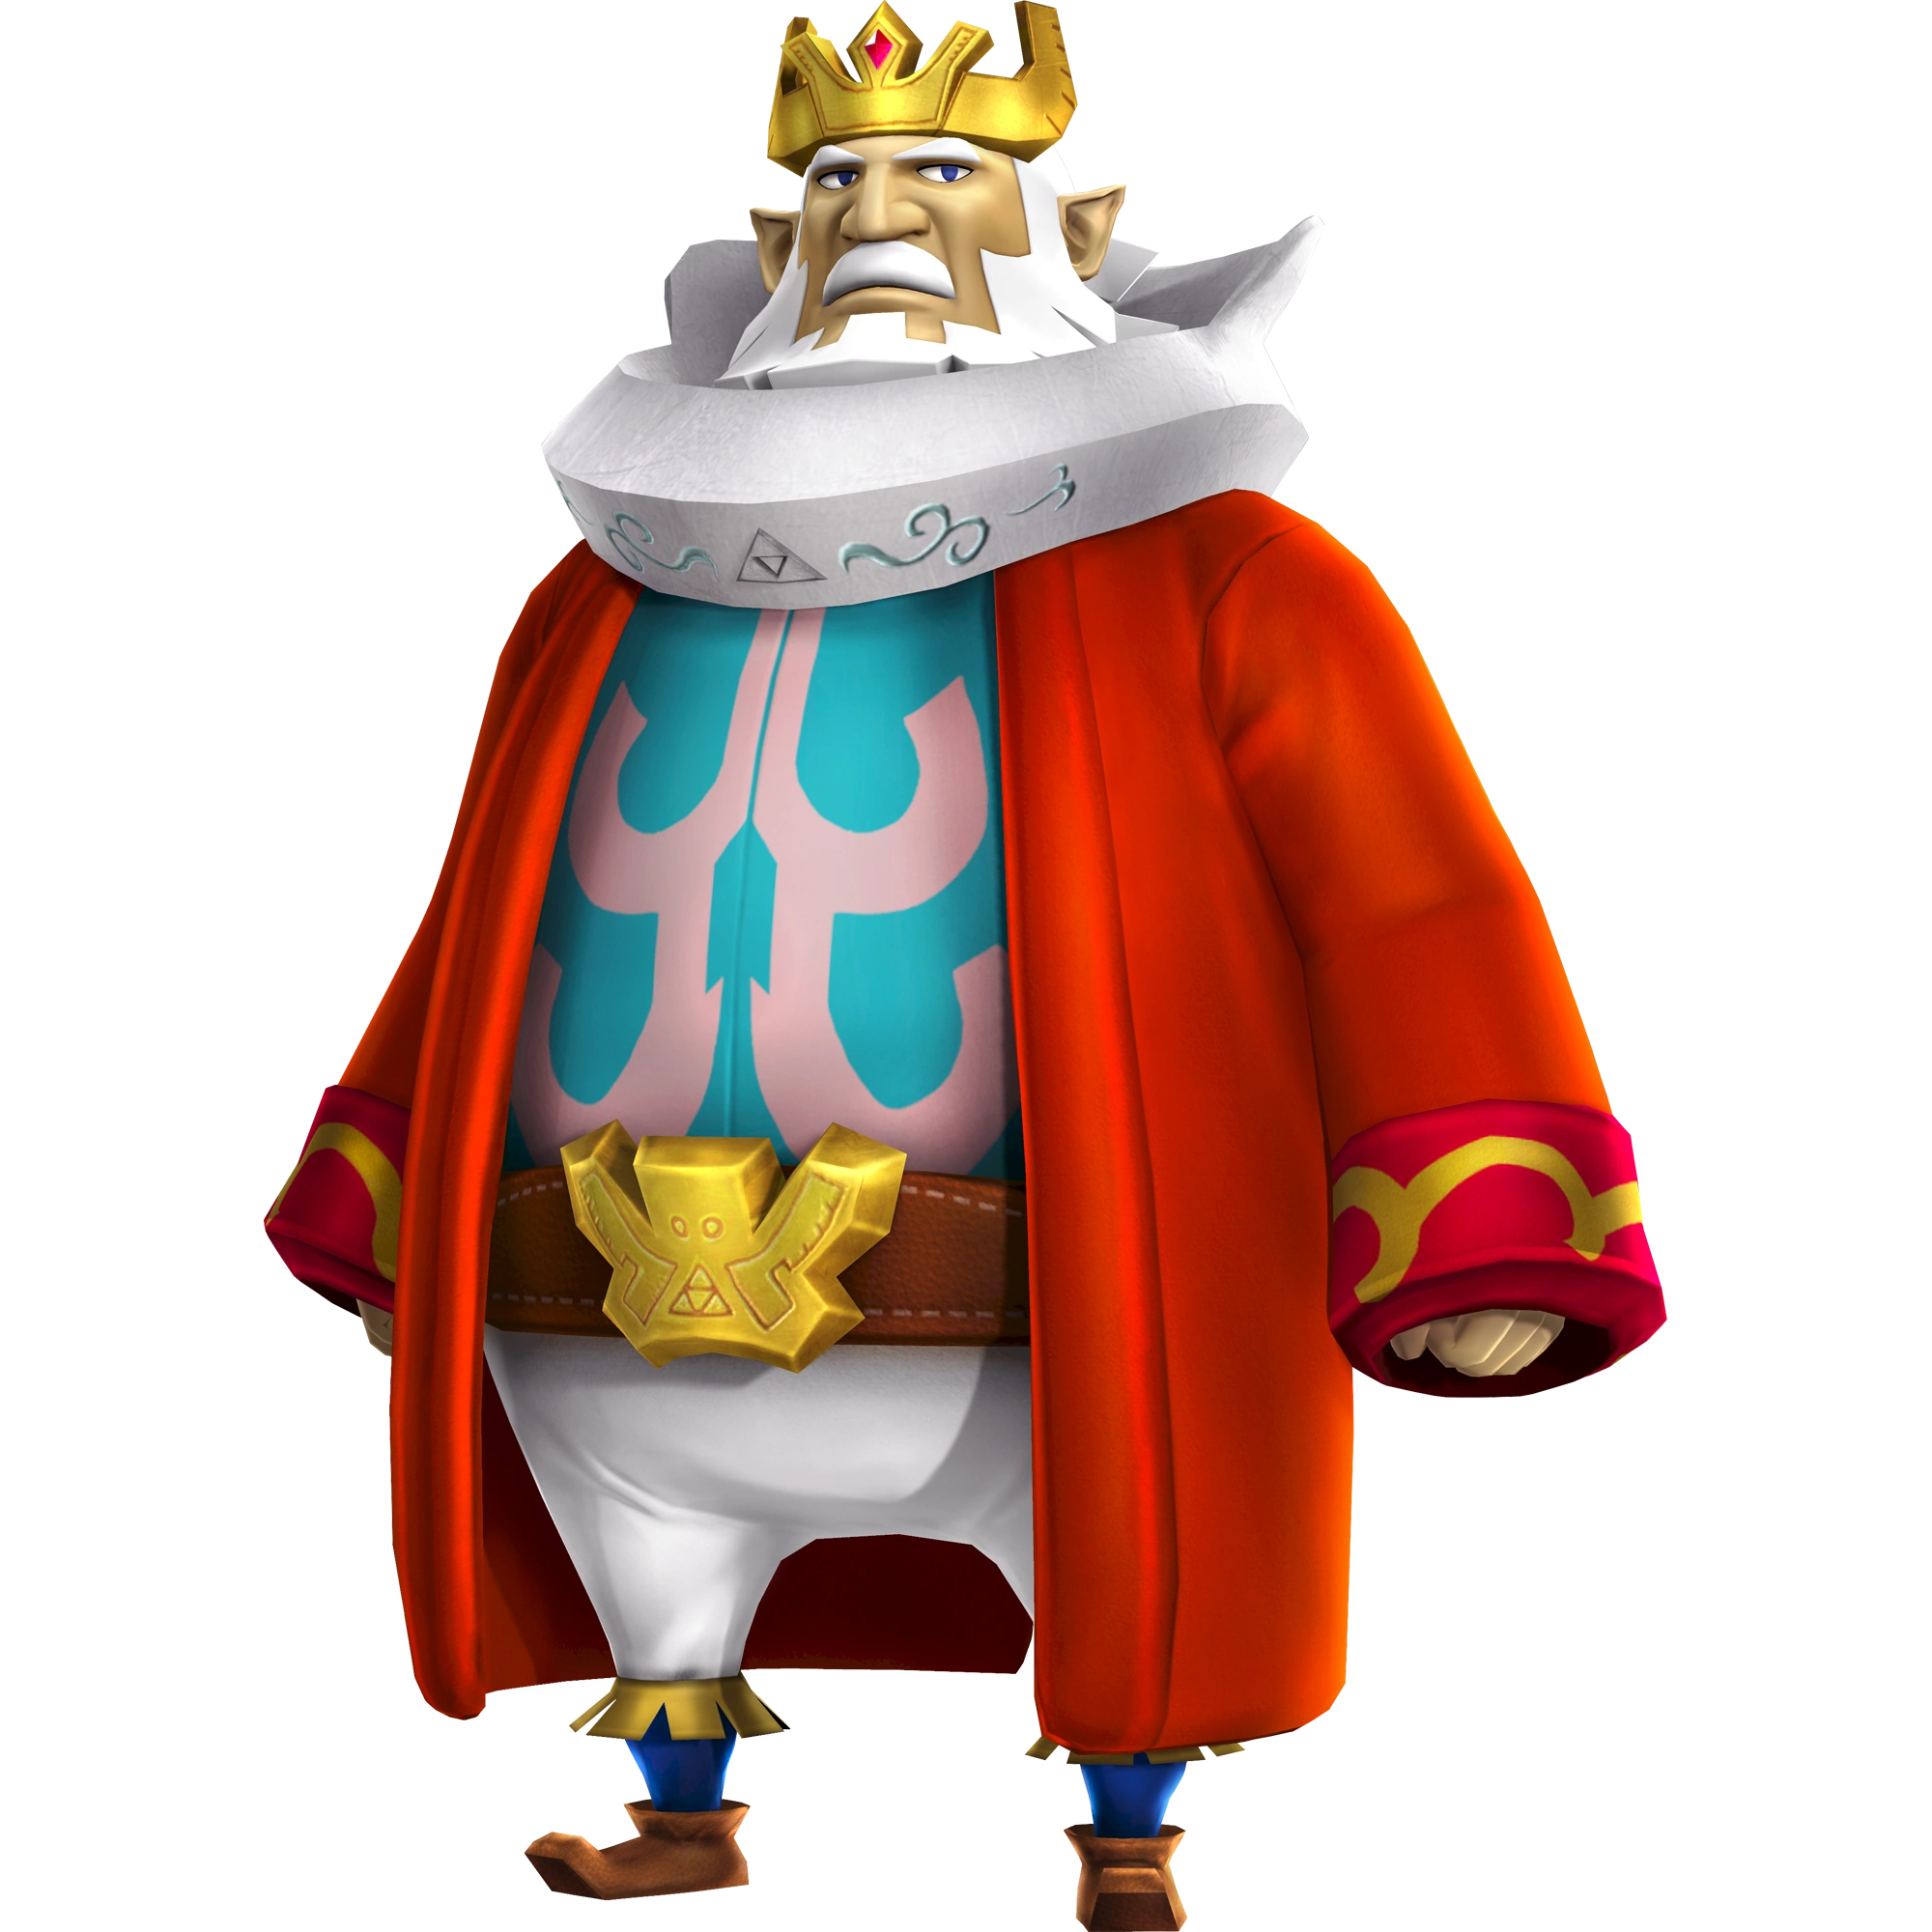
| King Daphnes | |
 | |
| Era: | |
| Race: | Hylian Spirit
|
| Title(s): | King of the Ancient Country
King of Red Lions |
| Occupation: | Ruler
|
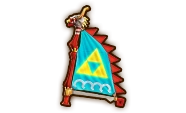
| Weapon(s): | Sail
|
| Craft(s): | Transfiguration
|
| Weakness: | Darkness
|
| Useful Weapon Skill: | VS Sea
|
| Voice Actors: | Eiji Maruyama
|
| First Appearance: | Hyrule Warriors Legends |
| Can be registered into Hyrule Warriors. | |
Daphnes Nohansen Hyrule (ダフネス・ノハンセン・ハイラル, Dafunesu Nohansen Hairaru), also known as King of Hyrule (ハイラル王), is a character first introduced in The Wind Waker. His failure to stop Ganondorf's return in the adult timeline left his spirit wandering. He seeks to find a hero worthy enough to save the land.
Character Information[]
Involvment in Story[]
After saving Tetra from the Helmaroc King, Link and Lana were left with no feasable way of restoring Hyrule again. It is here that Daphnes approched them, explaining that the land had been morphed due to an "evil prescence" in Tetra's world. The three traveled to the Temple of Souls, where they saved Cia, knowing she could aid in the fight to come. They set out to the now fused Earth Temple and Wind Temple, where the King of Red Lions aided in the decisive final battle. After defeating Phantom Ganon, Tetra and Daphnes began to fade away, waving goodbye as their world began to restore itself with the power of the Triforce.
Personality[]
King Daphnes is a stern yet kind figure. He acts as a father figure to all those around him, and as a noble king puts the safety of others before his own. The prosperity of his kingdom and its people are his top priority. Despite his royal status, King Daphnes has a soft spot for children, often aiding the Link of the Great Sea Era with fatherly advise and patience. He's also known to tell the occasional joke in calm situations.
Quotes[]
- See also: King Daphnes/Quotes
Gameplay[]
| Keys: | Y Normal Attack ▲ | X Charge Attack ▲ | A Special Technique ▲ | B Evade |
Sail[]
- X Daphnes flies into the air and assumes his boat form. He then comes crashing down onto a circular pool of water that materializes on the ground below him, which deals knockback to enemies around it. The Wind Meter will be filled, and Daphnes' body will be surrounded by the wind element. While this is active, all of Daphnes' attacks will receive a significant speed boost. The Wind Meter lasts for approximately 30 seconds and can be replenished at any time.
- Y, X: Daphnes plants his sail into the ground and launches it upwards, knocking enemies upwards with it.
- Y, Y, X: Does a forward dash while twirling his sail in front of him, then finishes with a watery rising slash.
- Y, Y, Y, X: Takes his boat form, then sails in a circular pattern in a pool of water that appears beneath him. Finishes by detonating the pool of water, which knocks back enemies.
- Y, Y, Y, Y, X: Twirls his sail above him, creating a whirlwind that gets bigger and bigger and sucks enemies in. He then finishes by knocking the enemies away.
- Y, Y, Y, Y, Y, X: Turns into his boat form with water appearing on the ground beneath him. He then sails forward, bulldozing any enemies in his path, before coming to a sliding halt. He can be steered with the control stick.
- Y, Y, Y, Y, Y, Y: Daphnes swings his sail upwards and to the left before slamming it down onto the ground. He then swings the sail around his body and then slams it down again. He then twirls the sail in the air, creating a gale that takes enemies into it, and then slashes horizontally at the trapped enemies. He then charges forward twirling the sail in front of him, and finishes with a rising swing.
- A: Daphnes turns into his boat form and a large wave of water forms underneath him. He then rides the waves forward, bulldozing enemies in his path.
- Focus Spirit + A: The ail will rise into the air and grow significantly in size. Daphnes then slams the sail's shaft into the ground, dealing huge damage to enemies in a small area in front of him.
- Focus Spirit Finisher: Daphnes clutches his hand on his chest and closes his eyes. He then swings his arm to the side and summons a large watery explosion that knocks away enemies.
- Weak Point Smash: Daphnes swings the sail several times at the enemy. The sail then flies underneath him as he launches it at the enemy.
Weapons[]
| Weapon Information (Element: Water) | ||
|---|---|---|
| Description: A sail used by the King of Red Lions. It holds the awesome power of the wind and the fury of the Great Sea. Use a Strong Attack to summon the wind's blessings to increase your attack speed. | ||
| Windfall Sail | Skill Slots: 1~2 | |
|
Base Attack: 80 | 1★ Attack: 88 |
| 2★ Attack: 96 | 3★ Attack: 104 | |
| 4★ Attack: 112 | 5★ Attack: 120 | |
| Swift Sail | Skill Slots: 3~4 | |
|
Base Attack: 150 | 1★ Attack: 165 |
| 2★ Attack: 180 | 3★ Attack: 195 | |
| 4★ Attack: 210 | 5★ Attack: 225 | |
| Sail of Red Lions | Skill Slots: 6~8 | |
|
Base Attack: 280 | 1★ Attack: 308 |
| 2★ Attack: 336 | 3★ Attack: 364 | |
| 4★ Attack: 392 | 5★ Attack: 420 | |
| Sail of Red Lions + (Legends) | Skill Slots: 7~8 | |
|
|
Base Attack: 500 | 1★ Attack: 550 |
| 2★ Attack: 600 | 3★ Attack: 650 | |
| 4★ Attack: 700 | 5★ Attack: 750 | |
| Supercharged Sail (Legends) | Skill Slots: 7~8 | |
|
|
Base Attack: 500 | 1★ Attack: 550 |
| 2★ Attack: 600 | 3★ Attack: 650 | |
| 4★ Attack: 700 | 5★ Attack: 750 | |
| Secondary Element: Lightning | ||
Badge Materials[]
- See also: Hyrule Warriors/Badges
| Badge | Materials | ||
|---|---|---|---|
| Kokiri Sword I | Old Rag (1x) | ||
| Kokiri Sword II | Piece of Darknut Armor (1x) | Old Rag (1x) | |
| Kokiri Sword III | Moblin Flank (1x) | Old Rag (1x) | |
| Kokiri Sword IV | Stalmaster Wrist Bone (1x) | Old Rag (1x) | |
| Stamina Fruit I | Shield Moblin Helmet (1x) | ||
| Stamina Fruit II | Ghirahim’s Sash (1x) | Manhandla’s Toxic Dust (1x) | Shield Moblin Helmet (3x) |
| Stamina Fruit III | Ghirahim’s Cape (1x) | Manhandla’s Toxic Dust (2x) | Moblin Spear (2x) |
| Digging Mitts I | Shield Moblin Helmet (3x) | ||
| Digging Mitts II | Ghirahim’s Sash (1x) | Manhandla’s Toxic Dust (1x) | Shield Moblin Helmet (3x) |
| Digging Mitts III | Ghirahim’s Cape (1x) | Manhandla’s Toxic Dust (2x) | Moblin Spear (2x) |
| Din's Fire I | Moblin Flank (1x) | Old Rag (1x) | |
| Din's Fire II | Stalmaster Wrist Bone (1x) | Old Rag (1x) | |
| Din's Fire III | Thick Goron Helmet (1x) | Goron Armor Breastplate (2x) | Moblin Spear (2x) |
| Hover Boots I | Shield Moblin Helmet (2x) | ||
| Hover Boots II | Ghirahim’s Sash (1x) | Manhandla’s Toxic Dust (1x) | Shield Moblin Helmet (3x) |
| Hover Boots III | Ghirahim’s Cape (1x) | Manhandla’s Toxic Dust (2x) | Moblin Spear (2x) |
| Fierce Deity's Mask I | Dinolfos Fang (1x) | Old Rag (1x) | |
| Fierce Deity's Mask II | Ghirahim’s Cape (1x) | Manhandla’s Toxic Dust (2x) | Moblin Spear (2x) |
| Badge | Materials | ||
|---|---|---|---|
| Empty Bottle I | Soldier's Uniform (1x) | ||
| Empty Bottle II | Stalmaster Wrist Bone (1x) | Soldiers Uniform (1x) | |
| Empty Bottle III | Manhandla’s Sapling (1x) | Ghirahim’s Sash (2x) | Moblin Spear (2x) |
| Hornet Larvae I | Shield Moblin Helmet (1x) | ||
| Hornet Larvae II | Ghirahim’s Sash (1x) | Manhandla’s Toxic Dust (1x) | Shield Moblin Helmet (3x) |
| Hornet Larvae III | Manhandla’s Sapling (1x) | Ghirahim’s Sash (2x) | Moblin Spear (2x) |
| Nayru's Love I | Shield Moblin Helmet (3x) | ||
| Nayru's Love II | Ghirahim’s Sash (1x) | Manhandla’s Toxic Dust (1x) | Shield Moblin Helmet (3x) |
| Nayru's Love III | Thick Goron Helmet (1x) | Goron Armor Breastplate (2x) | Moblin Spear (2x) |
| Goron Tunic I | Shield Moblin Helmet (2x) | ||
| Goron Tunic II | Ghirahim’s Sash (1x) | Manhandla’s Toxic Dust (1x) | Shield Moblin Helmet (3x) |
| Goron Tunic III | Manhandla’s Sapling (1x) | Ghirahim’s Sash (2x) | Moblin Spear (2x) |
| Zora Tunic I | Shield Moblin Helmet (2x) | ||
| Zora Tunic II | Ghirahim’s Sash (1x) | Manhandla’s Toxic Dust (1x) | Shield Moblin Helmet (3x) |
| Zora Tunic III | Manhandla’s Sapling (1x) | Ghirahim’s Sash (2x) | Moblin Spear (2x) |
| Magic Armor I | Shield Moblin Helmet (2x) | ||
| Magic Armor II | Ghirahim’s Sash (1x) | Manhandla’s Toxic Dust (1x) | Shield Moblin Helmet (3x) |
| Magic Armor III | Manhandla’s Sapling (1x) | Ghirahim’s Sash (2x) | Moblin Spear (2x) |
| Sacred Shield I | Shield Moblin Helmet (2x) | ||
| Sacred Shield II | Ghirahim’s Sash (1x) | Manhandla’s Toxic Dust (1x) | Shield Moblin Helmet (3x) |
| Sacred Shield III | Manhandla’s Sapling (1x) | Ghirahim’s Sash (2x) | Moblin Spear (2x) |
| Mirror Shield I | Shield Moblin Helmet (2x) | ||
| Mirror Shield II | Ghirahim’s Sash (1x) | Manhandla’s Toxic Dust (1x) | Shield Moblin Helmet (3x) |
| Mirror Shield III | Manhandla’s Sapling (1x) | Ghirahim’s Sash (2x) | Moblin Spear (2x) |
| Badge | Materials | ||
|---|---|---|---|
| Farore's Wind I | Metal Plate (1x) | ||
| Farore's Wind II | Ghirahim’s Sash (1x) | Manhandla’s Toxic Dust (1x) | Shield Moblin Helmet (3x) |
| Farore's Wind III | Thick Goron Helmet (1x) | Goron Armor Breastplate (2x) | Moblin Spear (2x) |
| Goron's Bracelet I | Shield Moblin Helmet (2x) | ||
| Goron's Bracelet II | Ghirahim’s Cape (1x) | Ghirahim’s Sash (2x) | Moblin Spear (2x) |
| Hawkeye I | Shield Moblin Helmet (2x) | ||
| Hawkeye II | Ghirahim’s Cape (1x) | Ghirahim’s Sash (2x) | Moblin Spear (2x) |
| Beetle I | Shield Moblin Helmet (2x) | ||
| Beetle II | Ghirahim’s Cape (1x) | Ghirahim’s Sash (2x) | Moblin Spear (2x) |
| Whip I | Shield Moblin Helmet (2x) | ||
| Whip II | Ghirahim’s Cape (1x) | Ghirahim’s Sash (2x) | Moblin Spear (2x) |
Gallery[]
.png "King Daphnes Alternate Costume (HWL).png (27 KB)")
.png "King Daphnes Alternate Costume 2 (HWL).png (28 KB)")
.png "King Daphnes Alternate Costume 3 (HWL DLC).png (215 KB)")
.png "King Daphnes Alternate Costume 4 (HWL DLC).png (36 KB)")
")
External Links[]
| This Hyrule Warriors related article is a stub. You can help the wiki by expanding it. |
| Hyrule Warriors • Legends • Definitive Edition • Hyrule Warriors: Age of Calamity |
| Characters |
| Hyrule Warriors |
| Link • Impa • Sheik • Lana • Princess Zelda • Ganondorf • Darunia • Princess Ruto • Agitha • Midna • Zant • Fi • Ghirahim • Cia • Volga • Wizzro • Twili Midna • Young Link • Tingle • Ganon • Cucco |
| Hyrule Warriors Legends |
| Linkle • Skull Kid • Toon Link • Tetra • King Daphnes • Medli • Marin • Toon Zelda • Ravio • Yuga |
| Hyrule Warriors Age of Calamity |
| Urbosa • Mipha • Daruk • Revali • Hestu • Sidon • Yunobo • Teba • Riju • Maz Koshia • Master Kohga • King Rhoam • Great Fairies • Terrako |
| EX: Pulse of the Ancients |
| Battle-Tested Guardian |
| EX: Guardian of Remembrance |
| Sooga • Purah & Robbie |
| Bosses |
| King Dodongo • Gohma • Manhandla • Argorok • The Imprisoned • Ganon • Great Fairy Helmaroc King • Phantom Ganon • Astor |
| Locations |
| Hyrule Warriors |
| Hyrule Field • Eldin Caves • Faron Woods • Valley of Seers • Death Mountain • Lake Hylia • Twilight Field • Palace of Twilight • Skyloft • Sealed Grounds • Temple of the Sacred Sword • Temple of Souls • Gerudo Desert • Ganon's Tower |
| Hyrule Warriors Legends |
| Forsaken Fortress • Wind and Earth Temples |
| Hyrule Warriors Age of Calamity |
| Breach of Demise • Zora's Domain • Tabantha Frontier • Gerudo Town • Hyrule Outpost • Great Hyrule Forest • Cenel Peak • Akkala Citadel • Yiga Clan Hideout • Damel Forest • Hyrule Castle • Lanayru Wetlands • Hyrule Ridge • Fort Hateno • Great Plateau • Hyrule Castle Town |
| EX: Guardian of Remembrance |
| Goponga Village • Kakariko Village • Lanayru Road • Mount Daphnes |
| Features |
| Items • Adventure Mode • Unit Types • Potion Mixtures • Badges • Materials • Weapon Skills • My Fairy |