

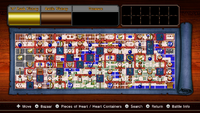
Adventure Mode screenshot.
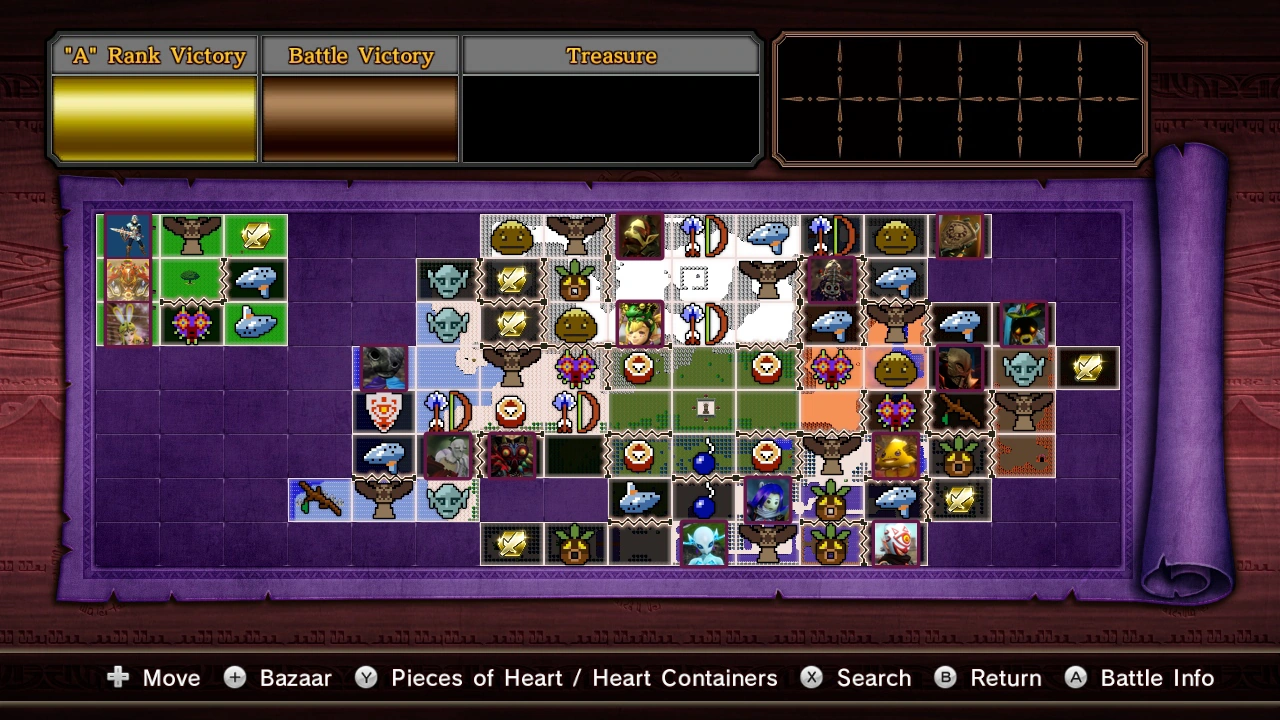
Adventure Mode (アドベンチャーモード) is a virtual board game experience. The main objective for each map to search for the key to the boss's dungeon and defeat the boss.
The modes are battles on a 16x8 grid, based on the original Zelda map. Elemental Fairies can be rescued to remove damaging fields. Secondary objectives awarding hearts or Gold Skulltulas depend on the character or stage. Score an "S" or "A" rank to obtain heart containers, pieces, weapons, or alternate-color costumes. Exclusive battle scenarios with varied allies and opponents are present.
Console Differences[]
The Wii U and 3DS versions of the game have distinct map layouts and rewards, with rewards allocated to different maps. Beating the first Adventure Map unlocks the Great Sea Map, Master Quest Map, Termina, and Twilight Maps.
Item Cards[]
These situational commands are available only in this mode.
| Icon | Item Card | Description |
|---|---|---|
 |
Compass | Search an unexposed area of the map to see where other item cards can be used. |
 |
Bomb | Use on walls to find hidden caves. |
 |
Water Bomb | Use on rocks in the water to destroy them. |
 |
Raft | Use this on piers to get to the opposite shore. |
 |
Ladder | Use to move across broken docks in the water. |
 |
Hookshot | Use on distant targets to pull self towards them. |
| Ice Arrow | Use on flaming circles to uncover hidden stairways. | |
 |
Candle | Use on trees to uncover hidden stairways. |
 |
Digging Mitts | Use to dig into the ground that have been marked with green X's. |
 |
Power Bracelet | Use to move heavy rocks, tomb stones, and statues to uncover hidden stairways. |
 |
Recorder | Use on small bodies of water, patches of desert sand, open fields, heavy objects unaffected by the power bracelet, and trees not burned by the candle to reveal secrets and enemies. |
 |
Goddess's Harp | Use on small groups of Goddess Butterflies to make a Gossip Stone appear. |
| Icon | Item Card | Description |
|---|---|---|
 |
Clawshot | A variation of the Hookshot, it has the same function as its counterpart. |
 |
Ooccoo | Use on portal stones to warp from one area to another within the Twilight Realm. |
 |
Lantern | Use on torches to reveal hidden enemies. |
 |
Jar | Use on switches to reveal hidden staircases. |
 |
Fishing Rod | Use to catch fish in bodies of water. |
 |
Spinner | Use on cog-shaped holes to reveal hidden staircases. |
 |
Tears of Light | Use to clear away areas covered in Twilight. |
 |
Tears of Twilight | Use to reopen all areas affected by the Twilight Realm. It will only appear once all the Twilight has been cleared from the map and can be activated on any map square. |
| Icon | Item Card | Description |
|---|---|---|
 |
Goron Mask | Activates switches which unlock hidden rewards. |
 |
Deku Mask | Use on launch flowers to fly across gaps, traveling from one area to another. |
 |
Zora Mask | Use on whirlpools to reveal hidden enemies. |
 |
Mask of Truth | Doubles the user's defense for one battle. |
 |
Majora's Mask | Maxes out Special and Magic gauges for one battle. |
 |
Song of Time | Resets the whole map before the moon falls. |
 |
Inverse Song of Time | Grants the user 10 extra days before the moon falls. |
 |
Deku Stick | Use on torches to reveal hidden enemies. |
 |
Giant | Use all four on the square containing the clock tower to unlock a hidden section of the map. |
| Icon | Item Card | Description |
|---|---|---|
 |
Wind Waker | Eliminates wind barriers. |
 |
Salvage Arm | Use on green glowing circles to unlock new rewards. |
 |
Sea Map | Use on splashes in the water to have a Fishman appear and mark enemy locations on the map. |
 |
Cannon | Destroys enemy ships. |
 |
Hero's Bow | Stops tornadoes. |
 |
Boomerang | Defeats Big Octos. |
 |
Hyoi Pear | Lures seagulls to find hidden treasure. |
 |
Power Bracelets | Used for moving Stone Heads. |
 |
Hammer | Used for activating switches. |
 |
Deku Leaf | Use on windmills to reveal hidden passages. |
| Icon | Item Card | Description |
|---|---|---|
 |
Grandpa Ulnira | Use on phone booth trees. |
 |
Power Bracelet | Use to move heavy rocks and tomb stones. |
| Magic Powder | Use on torches to reveal new paths. | |
 |
Full Moon Cello | Fills up the player's special gauge. |
 |
Conch Horn | Increases the player's defense. |
 |
Sea Lily Bell | Fills up the player's magic gauge. |
 |
Surf Harp | Increases the player's experience. |
 |
Wind Marimba | Increases the player's Rupees. |
 |
Coral Triangle | Raises the drop rate of fairy foods. |
 |
Organ of Evening Calm | Raises the drop rate of materials. |
 |
Thunder Drum | Raises the drop rate of weapons. |
| Icon | Item Card | Description |
|---|---|---|
 |
S.S. Linebeck | Increases KO count battle rank for 3 battle turns. |
 |
Iron Ship | Increases completion time battle rank for 3 battle turns. |
 |
Golden Ship | Increases damage taken battle rank for 3 battle turns. |
 |
Spirit Train | Causes all routes to be unlocked by battle rank C for 3 battle turns. |
 |
Steel Train | Adds random recommended elements to all battles for 3 battle turns. |
 |
Golden Train | Removes warrior restrictions from all battles for 3 battle turns. |
 |
Cyclone Slate | Causes Golden Frogs to reveal enemies within warping squares. |
 |
Railway Track | Reconnects severed railways on certain squares. |
 |
Whirlwind | Spins windmills that unlock hidden rewards. |
| Icon | Item Card | Description |
|---|---|---|
 |
Wall Painting | Enables the player to pass through fissures. Adds a darkness attribute to the Ravio Board. |
 |
Bow | Use on Beamos statues. |
 |
Power Glove | Use on light colored rocks to reveal hidden enemies. Adds a lightning attribute to the Ravio Board. |
 |
Boomerang | Use on black circular switches. |
 |
Hammer | Use on wooden pegs. |
 |
Hookshot | Use on distant targets to pull self towards them. |
 |
Fire Rod | Melts ice statues to reveal hidden enemies. Adds a fire attribute to the Ravio Board. |
 |
Ice Rod | Freezes fire statues to unlock certain passageways. Adds a water attribute to the Ravio Board. |
 |
Tornado Rod | Blows away tiles that reveal hidden rewards. Adds a darkness attribute to the Ravio Board. |
 |
Sand Rod | Creates sand pillars that reveal hidden rewards. Adds a fire attribute to the Ravio Board. |
 |
Baby Maiamai | Give to Mother Maiamai to obtain hidden rewards. Adds a water attribute to the Ravio Board. |
| Icon | Item Card | Description |
|---|---|---|
 |
Fairy of Fire | Use in keeps cursed with Barriers of Fire. |
 |
Fairy of Water | Use in keeps cursed with Barriers of Water. |
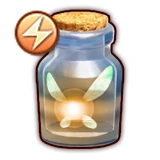 |
Fairy of Lightning | Use in keeps cursed with Barriers of Lightning. |
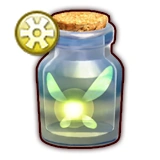 |
Fairy of Light | Use in keeps cursed with Barriers of Light. |
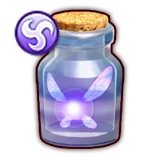 |
Fairy of Darkness | Use in keeps cursed with Barriers of Darkness. |
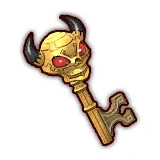 |
Boss Key | A key used for opening sealed-off areas. |
 |
Clock | Freezes nearby enemies momentarily. Exclusive to the Master Quest Map stages with the Don't Get Hit! rule. |
 |
Rupee Fairy | Foes temporarily drop Gold and Silver Rupees. Exclusive to Termina Map stages with the Rupee Competition challenge. |
Maps[]
Adventure Map[]
Default map. Players can play it to unlock characters, weapons, heart pieces, and heart containers not found in Legend Mode.
|
Characters unlocked on this map: |
Weapons unlocked on this map: |
Players also need to play this mode to unlock all Lv. 2 and Lv. 3 weapons for non-DLC characters that aren't obtained in Legend Mode.
- 3DS Differences
In addition to everything mentioned above, the following can also be unlocked on this map:
|
Characters: |
Weapons:
|
Some costumes have also been moved here. Lv. 2 and Lv. 3 weapons are now obtained on other maps.
Switch Differences
By comparison, as certain characters and weapons are already obtainable in other maps and modes, the following can be unlocked on this map:
| Characters: | Weapons:
|
Some costumes have also been moved here. Lv. 2 and Lv. 3 weapons are now obtained on other maps. The Zora Tunic and Goron Tunics have also been moved here.
Rewards Map[]
This map is unlocked by completing an illustration piece from defeated Gold Skulltulas. Within it, specific characters and bosses depicted in each puzzle can be fought, making it an ideal area for farming rare materials. Players only have access to the squares tied to illustration pieces they've completed. It is possible to unlock more reward maps via the DLC maps, as they each come with a set of Gold Skulltula, and new puzzle, per map.
Completing a non-DLC map unlocks the Zora Tunic for Link while finishing all of them unlocks his Goron Tunic.
- 3DS Differences
The costumes unlocked here have been changed. See gallery below for more details.
Master Quest Map[]

Master Quest Map costume locations.
DLC only map that contains bonus 8-bit weapon skins, heart containers, heart pieces, and palette-swapped costumes for all characters available up to this point. Contains the second and third level weapons for Cia, Volga, and Wizzro.
Additional rules for this map include:
- Speed Run: Players must complete the stage in under 15:00.
- No Healing: Players are unable to use potions or find hearts during battle. Leveling up will not heal players as it usually does.
- No Guarding: Players will always have their guard broken by all attacks. Dodges still work.
- No Item Attacks: Players are unable to use their attack items, such as the bombs, during battle.
- Don't Get Hit!: All allies die to a single attack; players will die if they are hit consecutively twice.
- 3DS Differences
This map now contains all Lv. 3 weapons. This carries over to the Switch version.
Twilight Map[]


Twilight Map costume locations.
DLC only map that contains additional 8-bit weapon skins, recolor costumes, heart containers, heart pieces, and Gold Skulltula. Also, defeated enemies drop x2 Materials if they drop any.
Map squares enveloped in Twilight will obscure the view of enemies on the battlefield map. The Tears of Light card is required in order to remove them. Other rules that apply to Twilight squares are:
- No Special Attacks: Defeating enemies will not fill the Special gauge, and no Force Fragments will appear.
- No Focus Spirit: Magic Jars will not appear, leaving players unable to fill their Magic gauge.
- No Item Attacks: Players are unable to use attack items like bombs or arrows during battle.
- 3DS Differences
Lv. 4 (+) weapons for various characters are now available on this map. 8-bit weapons have been removed.
Switch Differences
Lv. 4 weapons for various characters are now available on this map.
Termina Map[]

Termina Map costume locations.
DLC only map that contains additional 8-bit weapon skins, masks for characters to wear, heart containers, heart pieces, and Gold Skulltulas.
Players have a limited time to traverse the area, losing one hour for each battle. When the time counter reaches zero, the moon falls, resetting the map. The Dark Ruler can stop this counter. Map squares with owl statues are immune to the moon's effects. Players must clear their square to activate statues. Some battles may involve third-party forces, with the highest scorer winning.
- KO-Count Competition: Compete to earn points by defeating enemies.
- Rupee Competition: Compete to collect the most Rupees during battle. Stronger enemies carry more Rupees.
- Keep-Taking Competition: Compete to capture the most keeps. Cooperate with allies to capture as many keeps as possible.
- 3DS Differences
8-bit weapon skins are replaced with Lv. 4 weapons. This applies to the Switch version as well
Great Sea Map[]
A new map introduced in Legends, it is based on the overworld of The Wind Waker. Like the others, it has costumes for characters to wear, heart containers, heart pieces, and Gold Skulltulas. This map also contains all Lv. 2 weapons that cannot be unlocked in Legend Mode.
Map squares that contain hazards will cause different rules to affect battles. Items such as the Cannon, Boomerang, and Hero's Bow can get rid of these hazards. Special rules that apply to these squares are:
- Don't Get Hit!: Squares with Big Octos will cause playable characters to die in a single hit. Use Boomerang to remove the Big Octo.
- Double Damage: Squares with Warships will cause players to receive twice as much damage as usual. Use Cannon to remove the Warship.
- No Attack Items: Squares with Tornadoes will prevent players from using offensive items in battle. Use Hero's Bow to remove the Tornado.
Switch Differences
Because certain characters and weapons are already obtainable in other maps and modes, the following can be unlocked on this map:
| Characters: |
This map now contains all Lv. 2 weapons.
Master Wind Waker Map[]
Hyrule Warriors Legends DLC only map that contains additional recolor costumes, heart containers, heart pieces, and Gold Skulltula, as well as Medli's Lv. 2 through 4 weapons.
Map squares that contain some of the same hazards as the Great Sea Map will cause different rules to affect battles. Using items on them will function the same as before. But like with the Master Quest Map, it also contains many new rules that cannot be ignored.
Endless Night Rules for this map include:
- Speed Run: Players must complete the stage in under 20:00.
- No Healing: Players are unable to use potions or find hearts during battle. Leveling up will not heal players as it usually does.
- No Guarding: Players will always have their guard broken by all attacks. Dodges still work.
- No Special Attacks: Players are unable to use their Special Attacks.
- No Focus Spirit + No Fairy Magic: Magic Jars wont appear so players are unable to use Magic/Fairy abilities.
- No Rental Skills: Players are unable to use the My Fairy Rental skills.
Koholint Island Map[]
Hyrule Warriors Legends DLC only map that contains additional recolor costumes, heart containers, heart pieces, weapon ranks, and Gold Skulltula. The Lv. 2-4 weapons for Marin and Linkle's Boots are found here. Unlike most Adventure Mode maps, this one does not come with any additional rules in order to challenge players. Rather, 8 of the 11 item cards are designed to empower the player to some degree, making it one of the easiest maps to explore.
With the Eight Instruments of the Sirens, the player must dissipate eight map squares infected with Nightmares, a black mist preventing players from accessing a square. Initially, the instruments are only capable of being used on these squares. Once all of the Nightmare squares have been cleansed with the instruments, players will be able to use them at any time.
The Koholint Map is designed to be used in terms of material farming, Rupee gathering, and generating experience points to level up characters.
Switch Differences
Lv. 4 (+) weapons for various characters are now available on this map. 8-bit weapons have been brought back as skins for these weapons. Marin is now an unlockable.
Grand Travels Map[]
Hyrule Warriors Legends DLC only map that contains additional recolor costumes, heart containers, heart pieces, weapon ranks, and Gold Skulltula. The Lv. 2-4 weapons for Toon Zelda and Toon Link's Sand Wand are found here.
Switch Differences
Toon Link's Sand Rod and its Lv. 2-4+ weapons and Toon Zelda and her Lv. 2-4+ weapons are now unlockable on this map.
Lorule Map[]
Hyrule Warriors Legends DLC only map that contains additional recolor costumes, heart containers, heart pieces, weapon ranks, and Gold Skulltula. The Lv. 2-4 weapons for Ravio and Yuga are found here.
Switch Differences
Ravio, Yuga, and their Lv. 2-4+ weapons are now unlockable on this map.
Gallery[]
Rewards Map Illustrations
|
|---|
The following are the various Gold Skulltula Illustrations needed to unlock squares in the Rewards Map.
") True Partners ") Unity ") Chosen by Fate ") Evil Power ") Boss Rush ") Running to the Rescue (HW DLC) ") Rulers of Twilight (HW DLC) ") The Giants Gather (HW DLC) .png "Gold Skulltula Reward (HWL).png (1.77 MB)") Scattered Seeds (Legends) .png "Gold Skulltula Reward DLC 01 (HWL).png (1.71 MB)") A Prayer Received (Legends DLC) .png "Gold Skulltula Reward DLC 2 (HWL).png (1.87 MB)") The Nightmare Closes In (Legends DLC) .png "Gold Skulltula Reward DLC 3 (HWL).png (1.82 MB)") Those with the Wind (Legends DLC) .png "Gold Skulltula Reward DLC 4 (HWL).png (1.87 MB)") Guided by Courage (Legends DLC) |
Costume Gallery
|
|---|
| The following are the various costumes one can earn from each Adventure Mode Map.
") Skyward Sword costume for Link * ") Zora Tunic costume for Link * ") Goron Tunic costume for Link * ") Classic Tunic costume for Link + ") Skyward Sword costume for Zelda * .png "Ganondorf Costume (HWL DLC).png (2.54 MB)") The Wind Waker costume for Ganondorf + * Note: These costumes can only be unlocked in this map in Legends and Definitive Edition. + Note: These costumes can only be unlocked in this map in Definitive Edition.
Zora Tunic costume for Link + Goron Tunic costume for Link + ") Dark Link costume for Link * ") Beast Ganon re-color costume for Link * ") King Dodongo re-color costume for Lana * + Can only be unlocked in this map in HW. * Can only be unlocked in this map in Legends and Definitive Edition.
") Purple re-color costume for Link + ") Oracle!Impa re-color costume for Impa ") Dark re-color costume for Sheik ") Guardian of Time costume for Lana * ") Cia re-color costume for Lana ") TWW!Ganondorf re-color armor for Ganondorf ") Dark Lolita re-color costume for Agitha ") Shadow Beast re-color costume for Midna ") Shadow Beast re-color costume for Zant ") Fairy Queen re-color costume for Fi ") Sword of Demise re-color costume for Ghirahim ") Guardian of Time costume for Cia * ") Link re-color costume for Cia ") Classic Volvagia re-color costume for Volga ") Blue Wizzrobe re-color costume for Wizzro * Can only be unlocked in this map in Legends and Definitive Edition. + References the Four Swords & Four Swords Adventures when paired with the Hero's Tunic, Zora Tunic, and Goron Tunic.
") Twilight Princess costume for Link * ") Postman costume for Link * ") Yellow re-color costume for Link ") HW!Impa re-color costume for Sheik ") Link re-color costume for Lana ") Twilight Princess costume for Zelda * ") Ilia costume for Zelda * ") ALTP!Zelda re-color costume for Zelda ") Twilight Princes costume for Ganondorf * ") Demise re-color armor for Ganondorf ") Sweet Lolita re-color costume for Agitha ") Yellow re-color costume for Midna ") Phantom Zant re-color costume for Zant ") Light Spirit re-color costume for Fi ") Damaged self costume for Ghirahim ") Lana re-color costume for Cia ") TP!Big Poe re-color costume for Wizzro
") Ocarina of Time costume for Link * ") Fierce Deity Link costume for Link ") Ocarina of Time costume for Impa * ") Mask of Truth for Impa ") Ocarina of Time costume for Sheik * ") Kafei's Mask for Sheik ") Deku Mask for Lana ") Ocarina of Time costume for Zelda * ") Bunny Hood for Zelda ") Ocarina of Time costume for Ganondorf * ") Goron Mask for Darunia ") Ordon Shield for Midna ") Stone Mask for Fi ") Majora's Mask for Cia ") Giant's Mask for Volga ") Captain's Hat for Wizzro
.png "Link Alternate Costume (HWL).png (1.8 MB)") TWW!Link Outset Island outfit re-color costume for Link .png "Sheik Alternate Costume (HWL).png (16 KB)") Tetra re-color costume for Sheik .png "Lana Alternate Costume (HWL).png (1.5 MB)") Deku Princess re-color costume for Lana .png "Princess Zelda Alternate Costume (HWL).png (25 KB)") Toon Zelda re-color costume for Zelda .png "Ganondorf Alternate Costume (HWL).png (2.37 MB)") Phantom Ganon re-color costume for Ganondorf .png "Darunia Alternate Costume (HWL).png (2.07 MB)") PH!Biggoron re-color costume for Darunia .png "Agitha Alternate Costume (HWL).png (21 KB)") Gothic Lolita re-color costume for Agitha .png "Midna Alternate Costume (HWL).png (8 KB)") TWW!Floormaster re-color costume for Imp Midna .png "Fi Alternate Costume (HWL).png (1.31 MB)") TWW!Great Fairy re-color costume for Fi .png "Ghirahim Alternate Costume (HWL).png (1.55 MB)") Kalle Demos re-color costume for Ghirahim .png "Wizzro Alternate Costume (HWL).png (30 KB)") Brown re-color costume for Wizzro .png "Twili Midna Alternate Costume (HWL).png (48 KB)") TP!Zelda re-color costume for Twili Midna .png "Young Link Alternate Costume (HWL).png (10 KB)") Mask Salesman re-color costume for Young Link .png "Skull Kid Alternate Costume (HWL).png (30 KB)") Purple re-color costume for Skull Kid
.png "Link Alternate Costume 2 (HWL DLC).png (281 KB)") King Daphnes re-color costume for Link .png "Sheik Alternate Costume 2 (HWL).png (28 KB)") Oracle!Impa re-color costume for Sheik .png "Darunia Alternate Costume 2 (HWL DLC).png (225 KB)") TWW!Great Deku Tree re-color costume for Darunia .png "Ghirahim Alternate Costume 2 (HWL).png (22 KB)") Helmaroc King re-color costume for Ghirahim .png "Cia Alternate Costume 2 (HWL).png (26 KB)") Skull Dress Aryll re-color costume for Cia .png "Volga Alternate Costume 2 (HWL).png (28 KB)") TWW!Mothula re-color costume for Volga .png "Twili Midna Alternate Costume 2 (HWL).png (34 KB)") Sue-Belle re-color costume for Twili Midna .png "Tetra Alternate Costume 2 (HWL).png (13 KB)") Toon Zelda re-color costume for Tetra
.png "Agitha Alternate Costume 2 (HWL DLC).png (381 KB)") Crazy Tracy re-color costume for Agitha .png "Zant Alternate Costume 2 (HWL DLC).png (40 KB)") Mask-Mimic re-color costume for Zant .png "Ghirahim Alternate Costume 3 (HWL DLC).png (247 KB)") Prince Richard re-color costume for Ghirahim .png "Young Link Alternate Costume 2 (HWL DLC).png (11 KB)") Red Clothes re-color costume for Young Link .png "Skull Kid Alternate Costume 2 (HWL DLC).png (439 KB)") Deku Scrub re-color costume for Skull Kid .png "Linkle Alternate Costume 2 (HWL DLC).png (257 KB)") Evil Eagle re-color costume for Linkle
.png "Link Alternate Costume 4 (HWL DLC).png (509 KB)") Spirit Train re-color costume for Link .png "Princess Zelda Alternate Costume 4 (HWL DLC).png (26 KB)") PH!Phantom re-color costume for Zelda .png "Darunia Alternate Costume 3 (HWL DLC).png (68 KB)") ST!Goron Elder re-color costume for Darunia .png "Fi Alternate Costume 3 (HWL DLC).png (23 KB)") Three Fairy Spirits re-color costume for Fi .png "Twili Midna Alternate Costume 3 (HWL DLC).png (32 KB)") Astrid re-color costume for Twili Midna .png "Young Link Alternate Costume 3 (HWL DLC).png (200 KB)") Alfonzo re-color costume for Young Link .png "Skull Kid Alternate Costume 3 (HWL DLC).png (39 KB)") OoT/MM!Big Poe re-color costume for Skull Kid .png "Toon Link Alternate Costume 4 (HWL DLC).png (201 KB)") Engineer's Clothes re-color costume for Toon Link .png "King Daphnes Alternate Costume 3 (HWL DLC).png (215 KB)") Linebeck re-color costume for King Daphnes
.png "Lana Alternate Costume 4 (HWL DLC).png (26 KB)") ALBW!Zelda re-color costume for Lana .png "Midna Alternate Costume 3 (HWL).png (11 KB)") Devilish Girl re-color costume for Midna .png "Zant Alternate Costume 3 (HWL DLC).png (26 KB)") ALBW!Green Goriya re-color costume for Zant .png "Twili Midna Alternate Costume 4 (HWL DLC).png (1.3 MB)") Fissure Portal re-color costume for Twili Midna .png "Young Link Alternate Costume 4 (HWL DLC).png (368 KB)") Gulley re-color costume for Young Link .png "Skull Kid Alternate Costume 4 (HWL DLC).png (37 KB)") Masked Elder re-color costume for Skull Kid .png "King Daphnes Alternate Costume 4 (HWL DLC).png (36 KB)") Lorule King re-color costume for King Daphnes |
")
")
")
")
")
")
")
")
")
")
")
")
")
")
")
")
.png "Impa Alternate Costume (HWL).png (18 KB)")
.png "Princess Ruto Alternate Costume (HWL).png (16 KB)")
.png "Zant Alternate Costume (HWL).png (1.99 MB)")
.png "Cia Alternate Costume (HWL).png (20 KB)")
.png "Volga Alternate Costume (HWL).png (28 KB)")
.png "Tingle Alternate Costume (HWL).png (15 KB)")
.png "Linkle Alternate Costume (HWL).png (23 KB)")
.png "Toon Link Alternate Costume (HWL).png (64 KB)")
.png "Tetra Alternate Costume (HWL).png (12 KB)")
.png "King Daphnes Alternate Costume (HWL).png (27 KB)")
.png "Lana Alternate Costume 2 (HWL DLC).png (349 KB)")
.png "Princess Zelda Alternate Costume 2 (HWL).png (29 KB)")
.png "Princess Ruto Alternate Costume 2 (HWL).png (19 KB)")
.png "Midna Alternate Costume 2 (HWL).png (10 KB)")
.png "Fi Alternate Costume 2 (HWL DLC).png (24 KB)")
.png "Tingle Alternate Costume 2 (HWL).png (19 KB)")
.png "Toon Link Alternate Costume 2 (HWL DLC).png (363 KB)")
.png "King Daphnes Alternate Costume 2 (HWL).png (28 KB)")
.png "Link Alternate Costume 3 (HWL DLC).png (387 KB)")
.png "Sheik Alternate Costume 3 (HWL DLC).png (15 KB)")
.png "Lana Alternate Costume 3 (HWL DLC).png (22 KB)")
.png "Princess Zelda Alternate Costume 3 (HWL).png (20 KB)")
.png "Ganondorf Alternate Costume 2 (HWL).png (49 KB)")
.png "Cia Alternate Costume 3 (HWL).png (28 KB)")
.png "Wizzro Alternate Costume 2 (HWL DLC).png (39 KB)")
.png "Tingle Alternate Costume 3 (HWL DLC).png (20 KB)")
.png "Toon Link Alternate Costume 3 (HWL DLC).png (26 KB)")
.png "Tetra Alternate Costume 3 (HWL DLC).png (13 KB)")
.png "Impa Alternate Costume 2 (HWL DLC).png (16 KB)")
.png "Ganondorf Alternate Costume 3 (HWL DLC).png (33 KB)")
.png "Princess Ruto Alternate Costume 3 (HWL DLC).png (32 KB)")
.png "Volga Alternate Costume 3 (HWL DLC).png (26 KB)")
.png "Wizzro Alternate Costume 3 (HWL DLC).png (504 KB)")
.png "Tingle Alternate Costume 4 (HWL DLC).png (21 KB)")
.png "Linkle Alternate Costume 3 (HWL DLC).png (24 KB)")
.png "Tetra Alternate Costume 4 (HWL DLC).png (13 KB)")
.png "Impa Alternate Costume 3 (HWL DLC).png (27 KB)")
.png "Ganondorf Alternate Costume 4 (HWL DLC).png (37 KB)")
.png "Darunia Alternate Costume 4 (HWL DLC).png (49 KB)")
.png "Princess Ruto Alternate Costume 4 (HWL DLC).png (360 KB)")
.png "Agitha Alternate Costume 3 (HWL DLC).png (407 KB)")
.png "Fi Alternate Costume 4 (HWL DLC).png (370 KB)")
.png "Cia Alternate Costume 4 (HWL).png (25 KB)")
.png "Ghirahim Alternate Costume 4 (HWL DLC).png (21 KB)")
.png "Tingle Alternate Costume 5 (HWL DLC).png (16 KB)")
.png "Linkle Alternate Costume 4 (HWL DLC).png (19 KB)")
.png)
.png)
.png)
.png)
.png)
.png)
.png)
.png)
.png)
.png)
.png)
.png)
.png)
.png)
.png)
.png)
.png)
.jpg)
Fairy Gallery
|
|---|
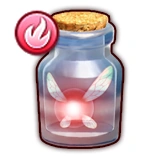
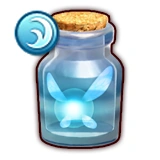
| The following are the various Fairies one can find on each Adventure Mode Map in Legends.
.png "Light Fairy 1 (HWL).png (27 KB)") Light Fairy .png "Dark Fairy 1 (HWL).png (28 KB)") Dark Fairy .png "Fire Fairy 1 (HWL).png (28 KB)") Fire Fairy .png "Water Fairy 1 (HWL).png (30 KB)") Water Fairy .png "Lightning Fairy 1 (HWL).png (29 KB)") Lightning Fairy
.png "Light Fairy 2 (HWL).png (29 KB)") Light Fairy .png "Dark Fairy 2 (HWL).png (28 KB)") Dark Fairy .png "Fire Fairy 2 (HWL).png (28 KB)") Fire Fairy .png "Water Fairy 2 (HWL).png (28 KB)") Water Fairy .png "Lightning Fairy 2 (HWL).png (27 KB)") Lightning Fairy
.png "Light Fairy 3 (HWL).png (26 KB)") Light Fairy .png "Dark Fairy 3 (HWL).png (29 KB)") Dark Fairy .png "Fire Fairy 3 (HWL).png (29 KB)") Fire Fairy .png "Water Fairy 3 (HWL).png (29 KB)") Water Fairy .png "Lightning Fairy 3 (HWL).png (29 KB)") Lightning Fairy
.png "Light Fairy 4 (HWL).png (27 KB)") Light Fairy .png "Dark Fairy 4 (HWL).png (27 KB)") Dark Fairy
.png "Fire Fairy 4 (HWL).png (28 KB)") Fire Fairy .png "Water Fairy 4 (HWL).png (28 KB)") Water Fairy .png "Lightning Fairy 4 (HWL).png (28 KB)") Lightning Fairy
.png "Light Fairy 5 (HWL).png (29 KB)") Koholint Island Light Fairy .png "Water Fairy 5 (HWL).png (25 KB)") Grand Travels Water Fairy .png "Dark Fairy 5 (HWL).png (28 KB)") Adventure Dark Fairy |
| This Hyrule Warriors related article is a stub. You can help the wiki by expanding it. |
| Hyrule Warriors • Legends • Definitive Edition • Hyrule Warriors: Age of Calamity |
| Characters |
| Hyrule Warriors |
| Link • Impa • Sheik • Lana • Princess Zelda • Ganondorf • Darunia • Princess Ruto • Agitha • Midna • Zant • Fi • Ghirahim • Cia • Volga • Wizzro • Twili Midna • Young Link • Tingle • Ganon • Cucco |
| Hyrule Warriors Legends |
| Linkle • Skull Kid • Toon Link • Tetra • King Daphnes • Medli • Marin • Toon Zelda • Ravio • Yuga |
| Hyrule Warriors Age of Calamity |
| Urbosa • Mipha • Daruk • Revali • Hestu • Sidon • Yunobo • Teba • Riju • Maz Koshia • Master Kohga • King Rhoam • Great Fairies • Terrako |
| EX: Pulse of the Ancients |
| Battle-Tested Guardian |
| EX: Guardian of Remembrance |
| Sooga • Purah & Robbie |
| Bosses |
| King Dodongo • Gohma • Manhandla • Argorok • The Imprisoned • Ganon • Great Fairy Helmaroc King • Phantom Ganon • Astor |
| Locations |
| Hyrule Warriors |
| Hyrule Field • Eldin Caves • Faron Woods • Valley of Seers • Death Mountain • Lake Hylia • Twilight Field • Palace of Twilight • Skyloft • Sealed Grounds • Temple of the Sacred Sword • Temple of Souls • Gerudo Desert • Ganon's Tower |
| Hyrule Warriors Legends |
| Forsaken Fortress • Wind and Earth Temples |
| Hyrule Warriors Age of Calamity |
| Breach of Demise • Zora's Domain • Tabantha Frontier • Gerudo Town • Hyrule Outpost • Great Hyrule Forest • Cenel Peak • Akkala Citadel • Yiga Clan Hideout • Damel Forest • Hyrule Castle • Lanayru Wetlands • Hyrule Ridge • Fort Hateno • Great Plateau • Hyrule Castle Town |
| EX: Guardian of Remembrance |
| Goponga Village • Kakariko Village • Lanayru Road • Mount Daphnes |
| Features |
| Items • Adventure Mode • Unit Types • Potion Mixtures • Badges • Materials • Weapon Skills • My Fairy |